Sunday, July 26, 2009
Create Separate Profiles in Google Chrome for Family Members and Stay Extra Safe
you have started to love Google Chrome and have made it the default browser on your computer, here’s a useful tip regarding your privacy. The tip is more relevant for people who have computers in the living room and that same machine is shared among all other family members.

The address bar in Google Chrome is almost as dangerous as the awesome bar in Firefox.
Why You Need Separate Profiles in Google Chrome
Google Chrome makes it very easy for you to access your web search history including the search queries that you may have typed in the past. Now this may sometimes lead to an slightly embarrassing situation if someone else use your browser because all your past interactions are exposed the moment he or she begins to type in the address bar.
To prevent yourself from getting into this ‘not so comfortable’ situation, what you can do is create a separate user profile in Google Chrome. Thus all your browser history, bookmarks, cookies, search terms, etc. are not shared with anyone else in the family.
How to Create Profiles in Google Chrome Browser
Unlike Firefox that ships with a Profile Manager, the only way to create multiple profiles in Google Chrome browser is manually. Here’s how:
Step 1: Load Chrome and choose "Clear Browsing History" from the Tools menu. This will clear all your private data.
Step 2. Open your Google Chrome installation folder that is available at:
For Windows Vista - C:\Users\\AppData\Local\Google\Chrome For Windows XP - C:\Documents and Settings\ \Local Settings\Application Data\Google\Chrome
 Step 3: Open Windows Explorer and switch to the "User Data" folder available inside Chrome installation folder.
Then select the subfolder caleld "default" and make a copy of it in the "User Data" folder itself. Give that copy a name, say, Your_Name. (See screenshot).
Step 4 (Optional): We will now initialize this new "Your_Name" profile to the factory default settings.
Open "Command Prompt", switch to the Chrome Application folder and run the following command:
chrome.exe --user-data-dir="..\User Data\Your_Name" -first-run
Step 5: So our new user profile is ready. To run Google Chrome using this profile instead of the default profile, just create a shortcut on your desktop, Quick launch bar or your Windows Start Menu.
Right click anywhere on the desktop, choose New -> Shortcut and type the following for location:
For Windows Vista: C:\Users\Aryaman\AppData\Local\Google\Chrome\Application\chrome.exe –user-data-dir="..\User Data\Your_Name"
For Windows XP: C:\Documents and Settings\User\Local Settings\Application Data\Google\Chrome\Application\chrome.exe –user-data-dir="..\User Data\Your_Name"
![]() Give this shortcut a "hard to guess" name, change the icon to use that of, say, Microsoft Word and you’re done.
Give this shortcut a "hard to guess" name, change the icon to use that of, say, Microsoft Word and you’re done.
Now none of your visits to those "adult sites" would be known to anyone else in the family. And no need for you switch to that incognito browsing mode.
8 Cool Tips & Tricks to Make Most Of Google Chrome
The popularity of any software can be guessed from the number of hacks that trail it after a release. Or the number of add-ons. Google Chrome seems to be not only holding its own but also trotting along. As of April 2009, it is the world’s fourth most popular browser. Not bad for a browser which is few months away from its first birthday.
As user opinions sally back and forth about browser preferences, one thing is not open to question. Firefox is definitely more expandable and customizable than all others out there (Don’t they call it the Swiss Army knife for the web).
But if you like the Chrome’s agility then there are ways to make it more versatile. We at MakeUseOf.com have gone over quite a lot of ground with the Chrome. You can read about some tips and tricks here and here.
Here are some more ways to reach under the hood and exploit some handy Chrome features.
1. Make Chrome’s consume less memory
By default, Chrome is a multi-process browser. Yawn! What’s that? Simply, it means that each tab runs as a separate process asking for separate resources from the computer. The current working tab gets the most priority over the others. This was intentionally designed to make web apps run faster in Chrome. This feature makes the browser zippier and more stable even with multiple open tabs.
But if you aren’t a heavy user and use the browser to surf only a single site at a time then disabling multiple processes can free up some CPU resources. To handle each web process Chrome has three settings –
–process-per-tab
The default mode; each tab gets an independent process of its own. This increases the rendering of webpages and makes the browser stable as each tab is a separate process from the rest. But it also consumes memory.
–process-per-site
One process for each unique website; for instance a user with two tabs open for Gmail and another for MakeUseOf will have the two Google tabs running under the same process.
–single-process
The simplest mode; all tabs run in a single process, much like the other browsers we have now. This setting frees up memory for other applications. This is what we are looking for.
Create a shortcut for Chrome. Open the Properties tab. Edit the Target field as shown in the picture by appending –single-process to the path.

Similarly you can create two more shortcuts for the other two processes to handle your web sessions in three ways.
2. Manage tabs with the Task Manager
This is an offshoot of Google Chrome’s multi-process nature which allows each tab to run separate from the other. This allows us to manage, reload or shut down each tab without affecting the rest of our browsing. All this can be done through the Task Manager. Press Shift and Escape to start the task manager or right click on the blue top bar. An unresponsive tab can be shut down without bringing down the browser by a simple press of the End process button.

3. Some stats for nerds
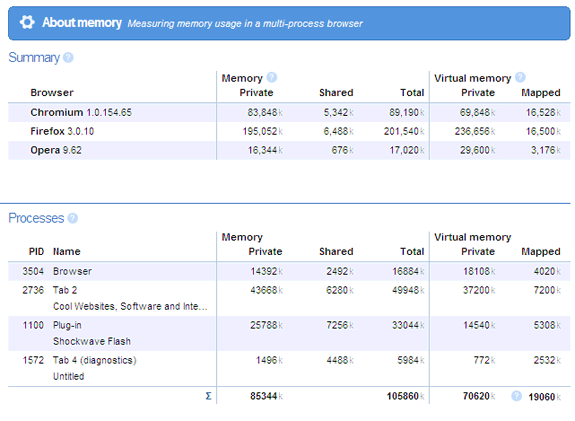
There is a simple way to tell which browser is using the most resources on your computer. Chrome’s task manager lets you examine the memory use of the opened browsers on your computer irrespective of make. Open task manager and click on the‘Stats for nerds’ link at the bottom. A new tab opens with detailed memory info for all running browsers. The second part of the page also describes Chrome’s process usage stats.

4. Some more stats on the Resources page
More for site administrators than for you and me but the resources page has a ton of info to offer. To track the resources used by a web page – right click inside the page. Select Inspect element – go to the Resources tab and reload the web page. You can view a list of images, scripts and objects from the web page and you can sort them by size or by loading time.

5. Drag to resize any text box
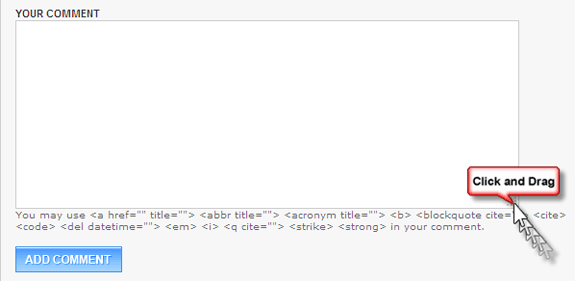
Do you feel that the size of a text box on any website is not worthy of your thoughts…then just place your mouse on the bottom right edge and drag to increase the size. Give MakeUseOf.com’s comment box the first drag.

6. Split Chrome into double-pane view
This bookmarklet from Chromeplugins.org is incredibly useful. The dual view feature is useful when you want to compare two websites or search results side by side. Drag theChrome Split Browser bookmarklet into your bookmarks toolbar. When you click the bookmarklet, it asks you to choose the two websites you want and displays them in a double pane.

7. Startup with multiple pages
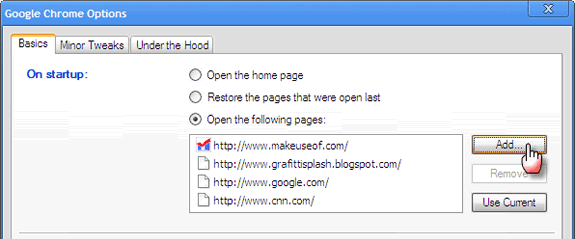
On launch, Chrome opens up with the ‘Most visited’ area. But it also lets us set options for starting the day by opening our most favored sites in several tabs at once. Click on the wrench icon (Customize and control Chrome) on the top right corner. Under Options – Basic tab we can add the pages we want to open on startup.

8. Drag and drop downloads from Chrome
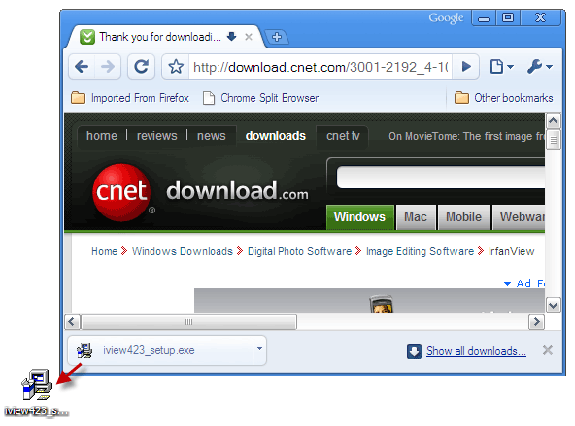
After finishing a download, you can copy it to the desktop or to any other folder by a simple drag and drop directly from Google Chrome.

Did I miss any of your favorite tips or tricks? Let us know in the comments and lets help each other create a more sleek Chrome experience.