Microsoft has chosen a completely different path for XP and it's boot features by trying to incorporate as much support for newer fastboot BIOSes that are on most current motherboards. They built XP in such a way as to make it able to take advantage of features in these new BIOSes, and one of the coolest things is a small application called bootvis. bootvis.
Bootvis watches everything that loads at boot time, from the moment the OS begins to load just after POST (Power On Self-Test) to the moment you get to a usable Desktop. Some programs, most notably Norton AntiVirus 2002, suck up valuable seconds before you can actually DO anything even though you're at the Desktop. bootvis generates a trace file that you load and can then "see" a visual representation of what's happening. Every file, driver, hard drive read/write, etc., is recorded. You can then use bootvis to optimize the loading of files during the boot sequence. bootvis will rearrange the ways these very files are stored on the hard drive, thereby improving the boot time dramatically.
Monday, August 24, 2009
Create a Password Reset Disk
If you’re running Windows XP Professional as a local user in a workgroup environment, you can create a password reset disk to log onto your computer when you forget your password. To create the disk:
1.Click Start, click Control Panel, and then click User Accounts.
2.Click your account name.
3.Under Related Tasks, click Prevent a forgotten password.
4.Follow the directions in the Forgotten Password Wizard to create a password reset disk.
5.Store the disk in a secure location, because anyone using it can access your local user account.
How to upload your files to multiple file hosting sites [Make mirrors]
With this service you can:
Upload your files once, and take links of 7 mirrors of your files.
--------------
First go there:
--------------
2.Choosing the file

--------------
3.Uploading...

--------------
4.Get the download link

--------------
5.Seven mirror of my file

DoNe
Upload your files once, and take links of 7 mirrors of your files.
--------------
First go there:
--------------
2.Choosing the file
--------------
3.Uploading...
--------------
4.Get the download link
--------------
5.Seven mirror of my file
DoNe
Get Genuine 1-Year Antivirus For Free..
Try This New Antivirus For Free..
This Is The Most Good Antivirus I Ever Had..
It Doesnot Slow Your Machine..
Just Follow The Steps :
>>Go And Register Yourself On The Link Below.
Register Here !!
>>Download The Antivirus From The Link Below.
DOWNLOAD The Software From Here !!
>>Install It And Enter Your Lisence Key Recieved In Your E-Mail After Registering..
**Enjoy Your Free Genuine Antivirus..
Please Say Thanks..
Get The Drivers You Need
- Visit Windows Update (XP Only)
- Look at the left hand pane and under Other Options click Personalize Windows Update.
- Now in the right hand pane check the box - Display the link to the Windows Update Catalog under See Also
- Below Choose which categories and updates to display on Windows Update - make sure you check all the boxes you want shown.
- Click Save Settings
- Now look in the left hand pane under See Also click Windows Update Catalog and choose what you're looking for. Choose either MS updates or drivers for hardware devices.
- Start the Wizard and off you go.
There are a TON of drivers there. I highly recommend you take a look at this page prior to downloading something from the web.
Save Your New Downloads
Since some people are still using modems and since MS is issuing es right and left for XP wouldn't it be nice if after you downloaded all the updates you could save them? Well, you can and MS has provided a way for you to do it.
Here's How:
- Logon to Windows Update
- Choose Windows Update Catalogue (left hand pane)
- Choose Find updates for Microsoft Windows operating systems (right hand pane)
- Choose your version and language then Search
- Choose one the following:
- Critical Updates and Service Packs
- Service Packs and Recommended Downloads
- Multi-Language Features (0)
- Once chosen simply click on what you want to download and then back at the top click Review Download Basket
- You are taken to the next page where at the top you can specify where the downloads are to be saved.
- Click Download now.
Each will make a directory under the root of the folder you saved them to. Once finished you need to go to where you saved the file (s) to and then simply install all your es.
Read-me's are available in each section so you know which one you are installing.
How to: Make a night-vision webcam
That's right. You can turn your webcam into a night vision webcam. And it's extremely easy. You don't even need any special parts/tools. And it's completely reversible Let's get started.
1) Smile for the camera
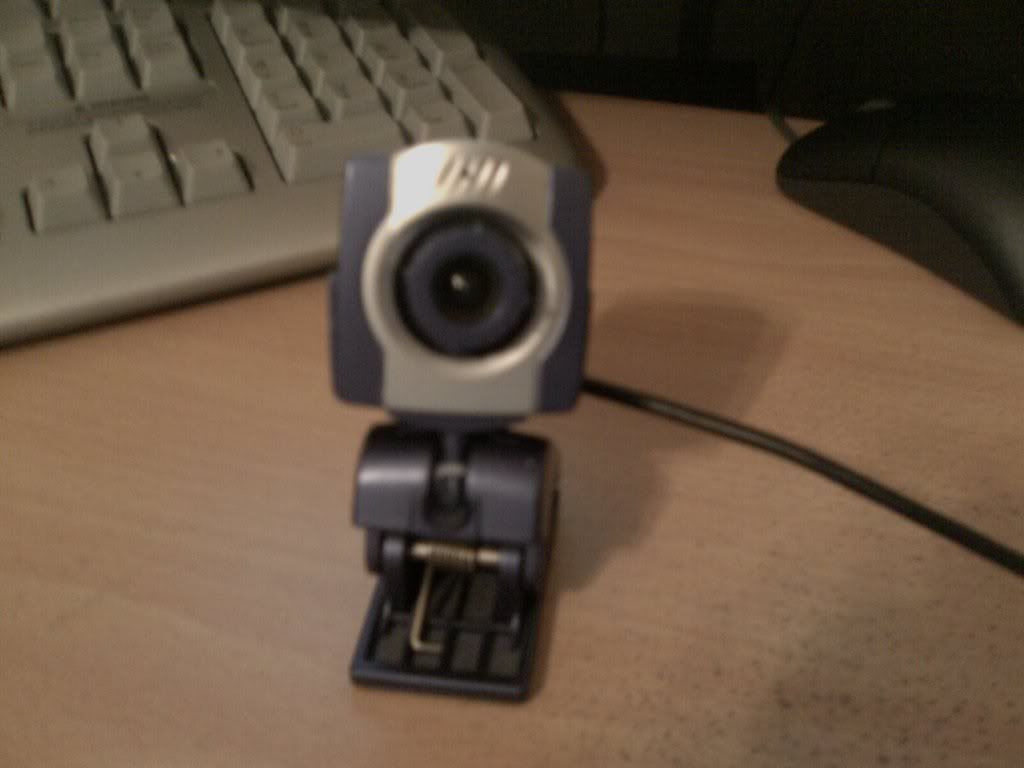
2) Take the camera apart (break it in half in the middle)
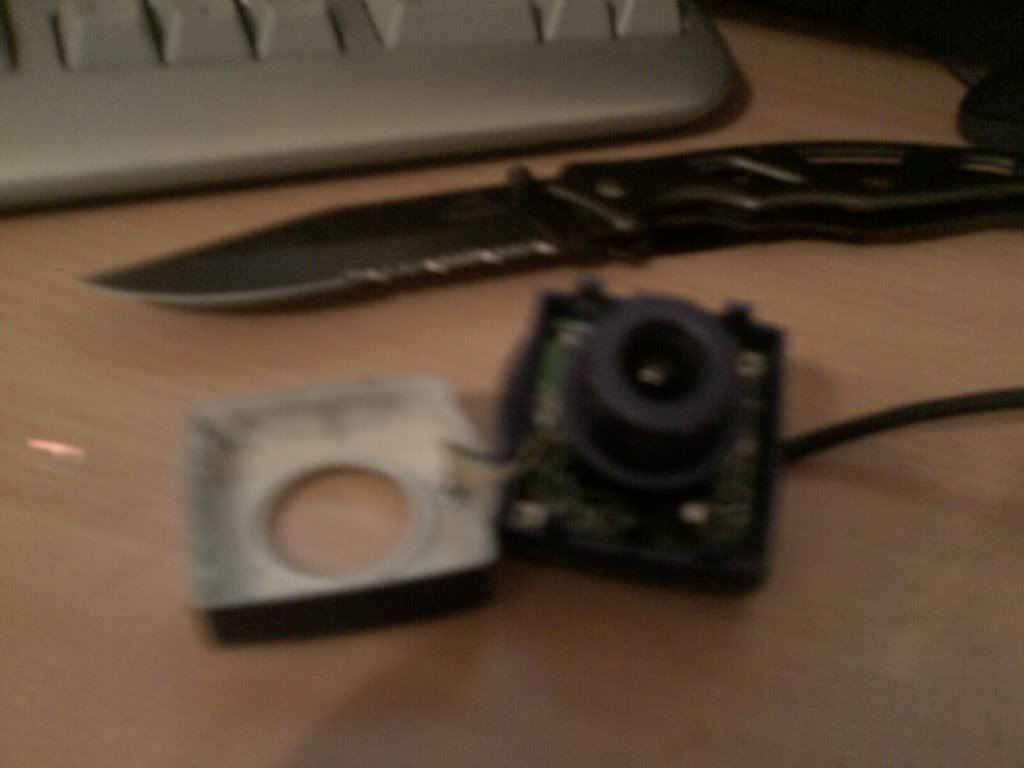
3) See this little orange square? Get rid of it!
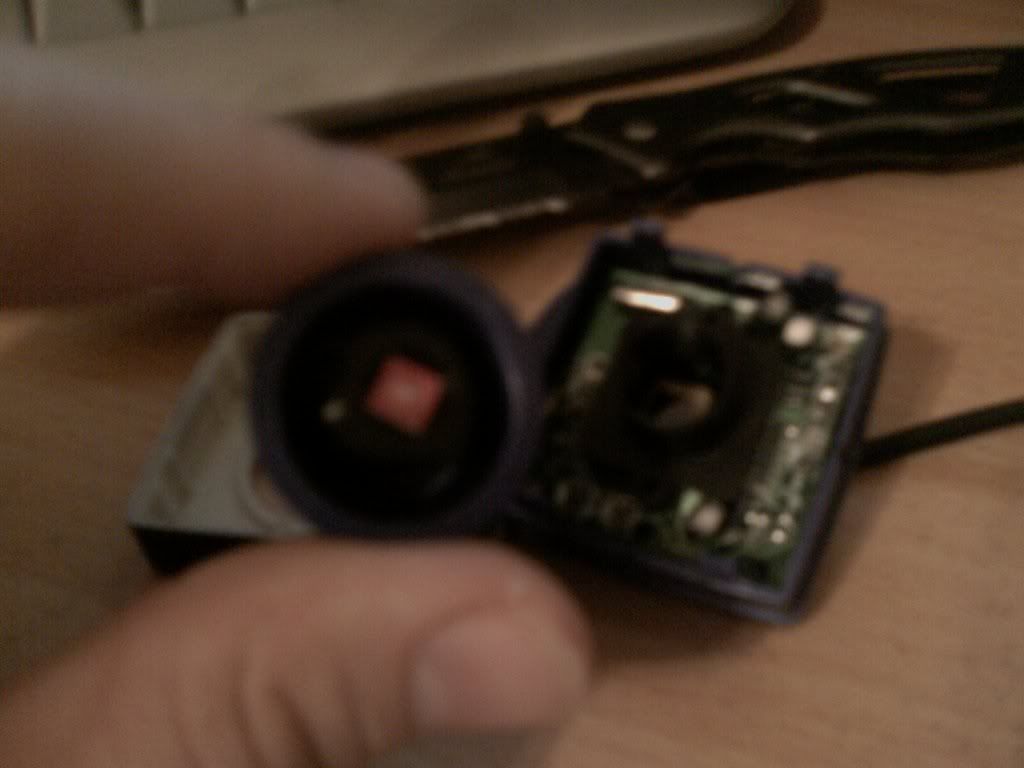
4) Tape that little square to the inside of the webcam so you don't lose it!
5) Put it back together and start taking pictures!
That's it! So, what did we do? That little square thing we removed is an IR filter. It basically limits the amount of light that reaches the lens. Your webcam will not be designed like mine, but it should be fairly easy to find on/around the lens or manual focus knob. Removing it allows Infrared rays to reach the lens, allowing it to see more light, as well as some other stuff.
Here's a pic of my arm with the IR filter removed:

Notice the veins? You wouldn't normally see those, but IR opens our eyes to all kinds of things. Try your camera in the light, then again with all the lights off. You'll be absolutely amazed.
1) Smile for the camera
2) Take the camera apart (break it in half in the middle)
3) See this little orange square? Get rid of it!
4) Tape that little square to the inside of the webcam so you don't lose it!
5) Put it back together and start taking pictures!
That's it! So, what did we do? That little square thing we removed is an IR filter. It basically limits the amount of light that reaches the lens. Your webcam will not be designed like mine, but it should be fairly easy to find on/around the lens or manual focus knob. Removing it allows Infrared rays to reach the lens, allowing it to see more light, as well as some other stuff.
Here's a pic of my arm with the IR filter removed:
Notice the veins? You wouldn't normally see those, but IR opens our eyes to all kinds of things. Try your camera in the light, then again with all the lights off. You'll be absolutely amazed.
Use Trial Software Forever :D

 Now we download stuff almost daily. New products pop out so often. You can use any software forever you want. You can download trial version, right. Trial version expires after some days. You can stop that expiration. You can tell trial version of the software to not count days or do not bother about time. The software will stay and keep working like original software forever and will not expire or cease to work. You do not have to change your system clock. This little software does it all.
Time Stopper is the software which can stop the time for try out version software. When you stop the time you can use your try-out versions forever. When you stop the time of a try-out version using this Time Stopper it works via this Time Stopper. Real time and date run normally on your system. You can use any number of try-out version softwares with this software.
How it Works
1. Open Time Stopper
2. Browse and select .exe of required trial software
3. Choose the new date (Any date which occurs in between your trial software time period before expiration, suggestion: set it to two days before trial software expiration date.)
4. Choose any time
5. Click open software on your selected date
If you wish to create an icon for your modified trial software and do not want to open Time stopper every time then use last button in software to create new icon. open that trial software after that from that newly created icon always otherwise it can expire.
This is 100% FREE and WORKING!!!

Download:Don't forget to say Thanx!!
Code:
files.getdropbox.com/u/657816/Programs/TS2.zip
How to check quality of movie without downloading all files
The best way to test quality and save bandwidth is to download the first rar file then extract remembering to check the "keep broken file" tab then play the file. Here is a guide how to do it
In this way you can save your band width
credit goes to the real Gif maker
In this way you can save your band width
credit goes to the real Gif maker
How to address 4GB RAM limit on 32-Bit Windows
Owing to cheaper memory it is becoming increasingly common that modern PC's have >4GB physical memory. However because of the limitations of 32-bit IBM PC architecture, to access full 4GB RAM or more, the CPU processor must support Physical Address Extension (PAE), as well as the North-bridge Chip must have the Memory Remapping feature. Even the hardware has enabled these features, the operating system may still constrain the full use of the large memory.
It is possible however to access this additional memory installed using something called a "RamDisk". Normally when your physical memory is exceeded Windows will use a "pagefile" (located on a hard drive... access times on hard drives is much slower than RAM) to act as additional memory. It is possible however to use your additional memory as a pagefile, using some special tools.
Windows XP/ Vista: VSuite from Romex
Windows 9x/ Me: Link
These two above applications contain some special code that isn't normaly available in other "RamDisk" software.
You can also use the tools to setup things like your TEMP folder, browser cache etc to be located in your memory for even faster access!
64-Bit Windows doesn't have such a 4GB physical memory limitation.
__________________
i make a full outta my self cause im tired being smart
i make a full outta my self cause im tired being smart
Make Your Windows Xp Run Faster Than Never Befor
These Are Some Tricks That Make Use Of Programs Listed In This Guide And Nothing Will Happen Even If You Go
DISABLE INDEXING SERVICES
Indexing Services is a small little program that uses large amounts of RAM and can often make a computer endlessly loud and noisy. This system process indexes and updates lists of all the files that are on your computer. It does this so that when you do a search for something on your computer, it will search faster by scanning the index lists. If you don't search your computer often, or even if you do search often, this system service is completely unnecessary. To disable do the following:
1. Go to Start
2. Click Settings
3. Click Control Panel
4. Double-click Add/Remove Programs
5. Click the Add/Remove Window Components
6. Uncheck the Indexing services
7. Click Next
OPTIMISE DISPLAY SETTINGS
Windows XP can look sexy but displaying all the visual items can waste system resources. To optimise:
1.Go to Start
2. Click Settings
3. Click Control Panel
4. Click System
5. Click Advanced tab
6. In the Performance tab click Settings
7. Leave only the following ticked:
- Show shadows under menus
- Show shadows under mouse pointer
- Show translucent selection rectangle
- Use drop shadows for icons labels on the desktop
- Use visual styles on windows and buttons
DISABLE PERFORMANCE COUNTERS
Windows XP has a performance monitor utility which monitors several areas of your PC's performance. These utilities take up system resources so disabling is a good idea.
To disable:
1. download and install the Extensible Performance Counter List (
CODE: SELECT ALL
)
2.Then select each counter in turn in the 'Extensible performance counters' window and clear the 'performance counters enabled' checkbox at the bottom.button below.
SPEEDUP FOLDER BROWSING
You may have noticed that everytime you open my computer to browse folders that there is a slight delay. This is because Windows XP automatically searches for network files and printers everytime you open Windows Explorer. To fix this and to increase browsing significantly:
1. Open My Computer
2. Click on Tools menu
3. Click on Folder Options
4. Click on the View tab.
5. Uncheck the Automatically search for network folders and printers check box
6. Click Apply
7. Click Ok
8. Reboot your computer
IMPROVE MEMORY USAGE
Cacheman Improves the performance of your computer by optimizing the disk cache, memory and a number of other settings.
Once Installed:
1.Go to Show Wizard and select All
2.Run all the wizards by selecting Next or Finished until you are back to the main menu. Use the defaults unless you know exactly what you are doing.
3.Exit and Save Cacheman
4.Restart Windows
OPTIMISE YOUR INTERNET CONNECTION
There are lots of ways to do this but by far the easiest is to run TCP/IP Optimizer.
1. Download(
CODE: SELECT ALL
) and install
2. Click the General Settings tab and select your Connection Speed (Kbps)
3. Click Network Adapter and choose the interface you use to connect to the Internet
4. Check Optimal Settings then Apply
5. Reboot
OPTIMISE YOUR PAGEFILE
If you give your pagefile a fixed size it saves the operating system from needing to resize the page file.
1. Right click on My Computer and select Properties
2. Select the Advanced tab
3. Under Performance choose the Settings button
4. Select the Advanced tab again and under Virtual Memory select Change
5. Highlight the drive containing your page file and make the initial Size of the file the same as the Maximum Size of the file.
Windows XP sizes the page file to about 1.5X the amount of actual physical memory by default. While this is good for systems with smaller amounts of memory (under 512MB) it is unlikely that a typical XP desktop system will ever need 1.5 X 512MB or more of virtual memory. If you have less than 512MB of memory, leave the page file at its default size. If you have 512MB or more, change the ratio to 1:1 page file size to physical memory size.
RUN BOOTVIS - IMPROVE BOOT TIMES download from(
CODE: SELECT ALL
)
BootVis will significantly improve boot times
1. Download and Run
2. Select Trace
3. Select Next Boot and Driver Trace
4. A Trace Repetitions screen will appear, select Ok and Reboot
5. Upon reboot, BootVis will automatically start, analyze and log your system's boot process. When it's done, in the menu go to Trace and select Optimize System
6. Reboot.
7. When your machine has rebooted wait until you see the Optimizing System box appear. Be patient and wait for the process to complete
REMOVE THE DESKTOP PICTURE
Your desktop background consumes a fair amount of memory and can slow the loading time of your system. Removing it will improve performance.
1. Right click on Desktop and select Properties
2. Select the Desktop tab
3. In the Background window select None
4. Click Ok
REMOVE FONTS FOR SPEED
Fonts, especially TrueType fonts, use quite a bit of system resources. For optimal performance, trim your fonts down to just those that you need to use on a daily basis and fonts that applications may require.
1. Open Control Panel
2. Open Fonts folder
3. Move fonts you don't need to a temporary directory (e.g. C:\FONTBKUP?) just in case you need or want to bring a few of them back. The more fonts you uninstall, the more system resources you will gain.
DISABLE UNNECESSARY SERVICES
Because Windows XP has to be all things to all people it has many services running that take up system resources that you will never need. Below is a list of services that can be disabled on most machines:
Alerter
Clipbook
Computer Browser
Distributed Link Tracking Client
Fast User Switching
Help and Support - (If you use Windows Help and Support leave this enabled)
Human Interface Access Devices
Indexing Service
IPSEC Services
Messenger
Netmeeting Remote Desktop Sharing (disabled for extra security)
Portable Media Serial Number
Remote Desktop Help Session Manager (disabled for extra security)
Remote Procedure Call Locator
Remote Registry (disabled for extra security)
Remote Registry Service
Secondary Logon
Routing & Remote Access (disabled for extra security)
Server
SSDP Discovery Service - (Unplug n' Pray will disable this)
Telnet
TCP/IP NetBIOS Helper
Upload Manager
Universal Plug and Play Device Host
Windows Time
Wireless Zero Configuration (Do not disable if you use a wireless network)
Workstation
To disable these services:
Go to Start and then Run and type "services.msc"
Doubleclick on the service you want to change
Change the startup type to 'Disable"
TURN OFF SYSTEM RESTORE
System Restore can be a useful if your computer is having problems, however storing all the restore points can literally take up Gigabytes of space on your hard drive. To turn off System Restore:
Open Control Panel
Click on Performance and Maintenance
Click on System
Click on the System Restore tab
Tick 'Turn off System Restore on All Drives'
Click 'Ok'
DEFRAGMENT YOUR PAGEFILE
Keeping your pagefile defragmented can provide a major performance boost. One of the best ways of doing this is to creat a separate partition on your hard drive just for your page file, so that it doesn't get impacted by normal disk usage. Another way of keeping your pagefile defragmented is to run PageDefrag. This cool little app can be used to defrag your pagefile, and can also be set to defrag the pagefile everytime your PC starts. To install:
Download(
CODE: SELECT ALL
) and Run PageDefrag
Tick "Defrag at next Reboot",
Click "Ok
DISABLE INDEXING SERVICES
Indexing Services is a small little program that uses large amounts of RAM and can often make a computer endlessly loud and noisy. This system process indexes and updates lists of all the files that are on your computer. It does this so that when you do a search for something on your computer, it will search faster by scanning the index lists. If you don't search your computer often, or even if you do search often, this system service is completely unnecessary. To disable do the following:
1. Go to Start
2. Click Settings
3. Click Control Panel
4. Double-click Add/Remove Programs
5. Click the Add/Remove Window Components
6. Uncheck the Indexing services
7. Click Next
OPTIMISE DISPLAY SETTINGS
Windows XP can look sexy but displaying all the visual items can waste system resources. To optimise:
1.Go to Start
2. Click Settings
3. Click Control Panel
4. Click System
5. Click Advanced tab
6. In the Performance tab click Settings
7. Leave only the following ticked:
- Show shadows under menus
- Show shadows under mouse pointer
- Show translucent selection rectangle
- Use drop shadows for icons labels on the desktop
- Use visual styles on windows and buttons
DISABLE PERFORMANCE COUNTERS
Windows XP has a performance monitor utility which monitors several areas of your PC's performance. These utilities take up system resources so disabling is a good idea.
To disable:
1. download and install the Extensible Performance Counter List (
CODE: SELECT ALL
Code:
http://www.microsoft.com/windows2000/remove404.mspx
)
2.Then select each counter in turn in the 'Extensible performance counters' window and clear the 'performance counters enabled' checkbox at the bottom.button below.
SPEEDUP FOLDER BROWSING
You may have noticed that everytime you open my computer to browse folders that there is a slight delay. This is because Windows XP automatically searches for network files and printers everytime you open Windows Explorer. To fix this and to increase browsing significantly:
1. Open My Computer
2. Click on Tools menu
3. Click on Folder Options
4. Click on the View tab.
5. Uncheck the Automatically search for network folders and printers check box
6. Click Apply
7. Click Ok
8. Reboot your computer
IMPROVE MEMORY USAGE
Cacheman Improves the performance of your computer by optimizing the disk cache, memory and a number of other settings.
Once Installed:
1.Go to Show Wizard and select All
2.Run all the wizards by selecting Next or Finished until you are back to the main menu. Use the defaults unless you know exactly what you are doing.
3.Exit and Save Cacheman
4.Restart Windows
OPTIMISE YOUR INTERNET CONNECTION
There are lots of ways to do this but by far the easiest is to run TCP/IP Optimizer.
1. Download(
CODE: SELECT ALL
Code:
www.speedguide.net/files/tcpoptimizer.exe
) and install
2. Click the General Settings tab and select your Connection Speed (Kbps)
3. Click Network Adapter and choose the interface you use to connect to the Internet
4. Check Optimal Settings then Apply
5. Reboot
OPTIMISE YOUR PAGEFILE
If you give your pagefile a fixed size it saves the operating system from needing to resize the page file.
1. Right click on My Computer and select Properties
2. Select the Advanced tab
3. Under Performance choose the Settings button
4. Select the Advanced tab again and under Virtual Memory select Change
5. Highlight the drive containing your page file and make the initial Size of the file the same as the Maximum Size of the file.
Windows XP sizes the page file to about 1.5X the amount of actual physical memory by default. While this is good for systems with smaller amounts of memory (under 512MB) it is unlikely that a typical XP desktop system will ever need 1.5 X 512MB or more of virtual memory. If you have less than 512MB of memory, leave the page file at its default size. If you have 512MB or more, change the ratio to 1:1 page file size to physical memory size.
RUN BOOTVIS - IMPROVE BOOT TIMES download from(
CODE: SELECT ALL
Code:
www.majorgeeks.com
)
BootVis will significantly improve boot times
1. Download and Run
2. Select Trace
3. Select Next Boot and Driver Trace
4. A Trace Repetitions screen will appear, select Ok and Reboot
5. Upon reboot, BootVis will automatically start, analyze and log your system's boot process. When it's done, in the menu go to Trace and select Optimize System
6. Reboot.
7. When your machine has rebooted wait until you see the Optimizing System box appear. Be patient and wait for the process to complete
REMOVE THE DESKTOP PICTURE
Your desktop background consumes a fair amount of memory and can slow the loading time of your system. Removing it will improve performance.
1. Right click on Desktop and select Properties
2. Select the Desktop tab
3. In the Background window select None
4. Click Ok
REMOVE FONTS FOR SPEED
Fonts, especially TrueType fonts, use quite a bit of system resources. For optimal performance, trim your fonts down to just those that you need to use on a daily basis and fonts that applications may require.
1. Open Control Panel
2. Open Fonts folder
3. Move fonts you don't need to a temporary directory (e.g. C:\FONTBKUP?) just in case you need or want to bring a few of them back. The more fonts you uninstall, the more system resources you will gain.
DISABLE UNNECESSARY SERVICES
Because Windows XP has to be all things to all people it has many services running that take up system resources that you will never need. Below is a list of services that can be disabled on most machines:
Alerter
Clipbook
Computer Browser
Distributed Link Tracking Client
Fast User Switching
Help and Support - (If you use Windows Help and Support leave this enabled)
Human Interface Access Devices
Indexing Service
IPSEC Services
Messenger
Netmeeting Remote Desktop Sharing (disabled for extra security)
Portable Media Serial Number
Remote Desktop Help Session Manager (disabled for extra security)
Remote Procedure Call Locator
Remote Registry (disabled for extra security)
Remote Registry Service
Secondary Logon
Routing & Remote Access (disabled for extra security)
Server
SSDP Discovery Service - (Unplug n' Pray will disable this)
Telnet
TCP/IP NetBIOS Helper
Upload Manager
Universal Plug and Play Device Host
Windows Time
Wireless Zero Configuration (Do not disable if you use a wireless network)
Workstation
To disable these services:
Go to Start and then Run and type "services.msc"
Doubleclick on the service you want to change
Change the startup type to 'Disable"
TURN OFF SYSTEM RESTORE
System Restore can be a useful if your computer is having problems, however storing all the restore points can literally take up Gigabytes of space on your hard drive. To turn off System Restore:
Open Control Panel
Click on Performance and Maintenance
Click on System
Click on the System Restore tab
Tick 'Turn off System Restore on All Drives'
Click 'Ok'
DEFRAGMENT YOUR PAGEFILE
Keeping your pagefile defragmented can provide a major performance boost. One of the best ways of doing this is to creat a separate partition on your hard drive just for your page file, so that it doesn't get impacted by normal disk usage. Another way of keeping your pagefile defragmented is to run PageDefrag. This cool little app can be used to defrag your pagefile, and can also be set to defrag the pagefile everytime your PC starts. To install:
Download(
CODE: SELECT ALL
Code:
www.sysinternals.com
) and Run PageDefrag
Tick "Defrag at next Reboot",
Click "Ok
Change Processor Name
change your processor name
Trick - SHOW YOUR PC PENTIUM 5 OR MORE
GO TO START>RUN>TYPE REGEDIT>HKEY_LOCAL_MACHINE>HARDWARE>DISCRIPTION>SYSTEM>CENTRAL
PROCESSOR>ON RIGHT HAND SIDE RIGHT CLICK ON PROCESSOR NAME AND STRING AND THE CLICK ON
MODIFY AND WRITE WHAT EVER YOU WANT
Trick - SHOW YOUR PC PENTIUM 5 OR MORE
GO TO START>RUN>TYPE REGEDIT>HKEY_LOCAL_MACHINE>HARDWARE>DISCRIPTION>SYSTEM>CENTRAL
PROCESSOR>ON RIGHT HAND SIDE RIGHT CLICK ON PROCESSOR NAME AND STRING AND THE CLICK ON
MODIFY AND WRITE WHAT EVER YOU WANT
How to make your own windows error box!!!
In this tutorial I will show you step-by-step how to make your own windows error box.
Things you will need
1.Notepad
2.common sense
Here we go.
Go to run

Type: notepad.exe

then after notepad pops up type this:

after that click on save then do this:

Your done.To see your message do this:


Enjoy
IF YOU LIKE THIS POST PLEASE SAY THANKS
Things you will need
1.Notepad
2.common sense
Here we go.
Go to run
Type: notepad.exe
then after notepad pops up type this:
after that click on save then do this:
Your done.To see your message do this:
Enjoy
IF YOU LIKE THIS POST PLEASE SAY THANKS
How to get FREE virgin media(ntl) tv
Hi guys, This is my tutorial on How to get FREE virgin media TV
This is almost the oldest trick in the book and its so easy to do.
1 take out the lead from the back of your set-top box.(the one that comes from the wall normaly its white)
2 cut off one end and put a normal male tv areal end in its place.
3 now plug the lead into your tv as you would a normal areal
4 scan for channels on your tv.
5 you should now have about 20 "free" channels.
you dont get every channel but its ok for free some of the channels you get are
MTV1
HALLMARK
VH1
BBC1,2,NEWS24,PARLIAMENT
ITV1,2
CH4
CH5
E4
CNN
CARTOON NETWORK
EUROSPORT
and more i will update this soon and give channel feq's soon. if you cant get this to work let me know and i will try and help you as best i can. have fun till next time
Enjoy,
How to change IPs
This is a tutorial about changing IP addresses. You can change your IP address for various reasons
1.) because you got banned in a game from some server.
2.) you got banned from some crappy forums and want to get a nub back
3.) if you are downloading from somewhere like Rapidshare, you might not have patience to wait for 3 hours to download another file again, if you change your ip, you can download another file instantly having to still wait for your "ticket" tho.
Ok there are many ways of changing your IP ;)
First is to go to the Start Menu and goto the RUN command.
after that type this:
blah blah blah>ipconfig
now see what your ip address is right NOW.
now you need to:
blah blah blah> ipconfig [SPACE ONCE] /release
(Note:this releases the IP address you are using now, and your internet wont work till u renew another IP address or the same one)
then like after 10-20 seconds do:
blah blah blah>ipconfig [SPACE ONCE] /renew
this gives you an iP address,either another one, or the same one you had before
that is one way of changing your IP Wink, note that it won't work all the time.
Now if you don't like all that technical stuff, then here is an easier way.
If you have a ROUTER, this is gonna be ownage.
Unplug your router power, and after that your DSL pwoer cable, wait for 10 seconds until your internet icon at the taskbar has an X with it.
now plug back your router in, then after 1 second of plugging your router in, plug that dsl of yours in.
When you are connected to the internet, try getting a file from rapidshare, and see if you can download.
If u can download, then congratulations, you have just changed your IP address :D
(Note again: sooner or later, you will run out of IP addresses to change,but that will take a long time for it to happen)
Go nuts!
+rep if you like this tut and if it actually works for ya ;)
Note:Not for people with static IP addresses
Having Fun with the Shutdown Function at School
You wanna mess around with your school network?
You wanna own the shit out of some kiddies who think they're the best?
Well thankfully there's the shutdown function in cmd
First of all you need to have access to a cmd prompt on the network for this to work.
If it's disabled you can obviously run everything from .bat files.
So first type in
Net View
This will give you all the names for all the computers on the network.
Then you want to find a target and write it down, so for example a name is //045-comproom1-05 then you will utilize that name to shutdown the computer.
What next? Well if you're a lil skiddy yourself then the easiest thing to do is type in
which will give you a gui interface and you'll be able to shutdown whichever computer you want with it, you can set a time, even throw in a funny comment like "owned" or somethin .
commands you will use if you just wanna use the command interface are
- shutsdown the pc.
shutdown with a comment.
logoff the user.
restart the computer.
and so on...
Well that was a nice and quick tutorial now wasn't it?
Have fun, be safe.
You wanna own the shit out of some kiddies who think they're the best?
Well thankfully there's the shutdown function in cmd
First of all you need to have access to a cmd prompt on the network for this to work.
If it's disabled you can obviously run everything from .bat files.
So first type in
Net View
This will give you all the names for all the computers on the network.
Then you want to find a target and write it down, so for example a name is //045-comproom1-05 then you will utilize that name to shutdown the computer.
What next? Well if you're a lil skiddy yourself then the easiest thing to do is type in
Code:
shutdown -i
which will give you a gui interface and you'll be able to shutdown whichever computer you want with it, you can set a time, even throw in a funny comment like "owned" or somethin .
commands you will use if you just wanna use the command interface are
Code:
shutdown -m //computername
- shutsdown the pc.
Code:
shutdown -m -c "owned"
shutdown with a comment.
Code:
shutdown -l
logoff the user.
Code:
shutdown -r
restart the computer.
and so on...
Well that was a nice and quick tutorial now wasn't it?
Have fun, be safe.
Use tabs as your home page in Firefox
"Is there a way that when you openFirefox you can have multiple pages open upon start-up of the program? In other words having multiple home pages?"
Why yes there is. And you can go about it a few ways. First, you can have it always show the tabs you had open last time that you exited Firefox.
Go to Tools, Options in Windows--or Preferences in Mac OS X.
In the main section, go to the drop-down menu "When Firefox Starts" and choose "Show my windows and tabs from last time."
Now every time you launch Firefox, it will give you all the tabs you had when you closed it.
But, if you want a defined set of tabs every time, no matter where you left off, you can do that too. Thanks to Shameer for the easy tip on this.
First open up the tabs you want to use as your home page set.
Then, go to Preferences in OS X--tools, then options in Windows.
Change the drop-down menu to "Show my homepage."
And then press the button "Use Current Pages." You should see the URLs for all the pages you had open listed in the text box marked home page. Each URL is separated by a pipe symbol. That's the one that looks like this: | Handy to know if you want to make a quick edit to the list later.
all-windows-xp-tricks part3
Remove "Help and Support" link from XP Start Menu
If you would like to remove the help and support link from the Start Menu, here's how:
Right click the Taskbar
Choose Properties
In the Taskbar and Start Menu Properties window, select the Start Menu tab
Click the Customize button
In the Customize Start Menu window, choose the Advanced tab
Uncheck the Help and Support option (see image below)
Click OK, then OK again to exit the Taskbar and Start Menu Properties window
Adding an item to the Send To menu
If you would like to add an additional item to your Send To menu, you need to add a shortcut to the SendTo folder. Here's how:
Go to Start>> Run. Type in: sendto [Enter]
Right click a blank space within the SendTo folder.
Click New>> Shortcut.
Follow the Create Short Cut wizards onscreen instructions to create a new shortcut.
Close the SendTo folder window.
This newly created shortcut will now appear in your Send To menu.
To delete a shortcut from the Send To menu:
Go to Start>> Run: Type in: sendto [Enter]
Find the item that you would like to delete.
Right click the item and select Delete.
Clear unwanted items from the "Open With" list
When you right click a file, you may see an option called 'Open With', which lists a number of programs on your computer to open that file with. If you would like to remove some of these options from this list, here's how:
Warning: The following tip involves editing the Windows Registry. Please make sure that you make a backup copy of the registry prior to making any changes.
Go to Start>> Run. Type in: REGEDIT [Enter] or Click OK.
Navigate to the following key:
HKEY_CURRENT_USER \ Software \ Microsoft \ Windows \ CurrentVersion \ Explorer \ FileExts
Click once on the 'FileExts' entry to empty its contents into the right pane.
Find the extension you wish to edit and click on the "+" sign to expand OpenWithList (see Figure #1)
Right click on the one that you would like to delete, then select Delete.
Note: Deleting the item from the above registry key may not remove it from the Open With list. Some items may still reside in the HKEY_CLASSES_ROOT registry key which is common for all user profiles.
Navigate to the following registry key: HKEY_CLASSES_ROOT\ .xxx \ OpenWithList (Where .xxx is a file extension)
When you find the desired entry, right click and select Delete.
Adding a special character
If you ever find the need to use a special character such as; ® or ©. Instead of opening up your character map each time you need to insert one of these symbols, there are shortcuts available that can be a great time saver. Here's how:
Go to Start>> All Programs>> Accessories>> System Tools>> Character Map.
Click the © symbol
At the bottom right corner, you will notice the keyboard shortcut used to insert this character. Be sure to write it down for future use.
To insert the character using the keyboard shortcut:
Position the cursor where you would like to insert the special character.
With NUM LOCK key on, hold down the ALT key and use the number pad keys to type the character value.
Move The Cursor Without A Mouse
If you would like to try out using your mouse with only your keyboard, Windows makes this option available to you. The utility is called MouseKeys. MouseKeys uses your numeric keypad to control the mouse cursor. This can be a handy feature if you are needing better accuracy while designing graphics. MouseKeys allows you to move the cursor pixel by pixel across the screen. Here is how to activate the MouseKeys feature:
Go to Start>> Control Panel>> Accessibility Options
Click the Mouse tab
Place a checkmark in the box titled: Use MouseKeys
Click the settings button to adjust the pointer speed
Click OK
Now you can use your numeric keypad to control your mouse cursor.
Unhide Components in Add/Remove Programs
You can uninstall many Windows components using the Add or Remove Programs.
Go to Start>> Control Panel>> Add/Remove Programs
While searching for old programs to delete from your system, you'll probably notice that some components are not there. Well, they really are there, Windows just has them hidden. The most common Windows program that is hidden and marked for removal by many PC users is MSN Messenger. Here's how you can tell Windows not to hide these components.
Go to Start>> Run. Type in: notepad.exe C:\windows\inf\sysoc.inf
In notepad, select Edit from the toolbar.
Click the Replace button.
In the "Find What" text area type HIDE
Leave the "Replace With" text area blank.
Click Replace All.
Exit the Replace window.
In notepad again, select File from the toolbar and click Save.
All of the hidden Windows components will now be visible in Add/Remove programs.
Brand XP
My new HP came loaded with an OEM version of XP on it. I noticed that they had their own icon under Run in the start menu. If you would like to brand your PC with your own clickable icon that will take you wherever you would like to go (eg: website, program), just follow the simple instructions below:
Note: This involves a registry tweak, please take all precautions by backing up your registry prior to making any changes to it.
Start up Notepad and insert the following information via copy and paste:
Windows Registry Editor Version 5.00
[HKEY_CLASSES_ROOT\CLSID\{2559a1f6-21d7-11d4-bdaf-00c04f60b9f0}]
@="YOUR TITLE HERE"
[HKEY_CLASSES_ROOT\CLSID\{2559a1f6-21d7-11d4-bdaf-00c04f60b9f0}\DefaultIcon]
@="YOUR ICON HERE"
[HKEY_CLASSES_ROOT\CLSID\{2559a1f6-21d7-11d4-bdaf-00c04f60b9f0}\InProcServer32]
@=hex(2):25,00,53,00,79,00,73,00,74,00,65,00,6d,00 ,52,00,6f,00,6f,00,74,00,25,\
00,5c,00,73,00,79,00,73,00,74,00,65,00,6d,00,33,00 ,32,00,5c,00,73,00,68,00,\
64,00,6f,00,63,00,76,00,77,00,2e,00,64,00,6c,00,6c ,00,00,00
"ThreadingModel"="Apartment"
[HKEY_CLASSES_ROOT\CLSID\{2559a1f6-21d7-11d4-bdaf-00c04f60b9f0}\Instance]
"CLSID"="{3f454f0e-42ae-4d7c-8ea3-328250d6e272}"
[HKEY_CLASSES_ROOT\CLSID\{2559a1f6-21d7-11d4-bdaf-00c04f60b9f0}\Instance\InitPropertyBag]
"CLSID"="{13709620-C279-11CE-A49E-444553540000}"
"method"="ShellExecute"
"Command"="YOUR TITLE HERE"
"Param1"="YOUR FUNCTION HERE"
[HKEY_CLASSES_ROOT\CLSID\{2559a1f6-21d7-11d4-bdaf-00c04f60b9f0}\shellex]
[HKEY_CLASSES_ROOT\CLSID\{2559a1f6-21d7-11d4-bdaf-00c04f60b9f0}\shellex\ContextMenuHandlers]
[HKEY_CLASSES_ROOT\CLSID\{2559a1f6-21d7-11d4-bdaf-00c04f60b9f0}\shellex\ContextMenuHandlers\{2559a1f 6-21d7-11d4-bdaf-00c04f60b9f0}]
@=""
[HKEY_CLASSES_ROOT\CLSID\{2559a1f6-21d7-11d4-bdaf-00c04f60b9f0}\shellex\MayChangeDefaultMenu]
@=""
[HKEY_CLASSES_ROOT\CLSID\{2559a1f6-21d7-11d4-bdaf-00c04f60b9f0}\ShellFolder]
"Attributes"=dword:00000000
Edit where it says YOUR ICON HERE to a path to an icon (ex. c:\\5staricon.ico), it must be 24x24 pixels and in *.ico format. Use double back slash for path names.
Edit both places where it says YOUR TITLE HERE to what you want it to say in the Start Menu (eg: 5 Star Support).
Edit where it says YOUR FUNCTION here to what you want it to do when you click it, it can be anything... your website, a local HTML document, a program, a Windows function, whatever your imagination can provide (eg:
CODE: SELECT ALL
).
Save this file as brand.reg, double-click it to enter in your information into the registry then refresh Explorer (log off/on) to see it in the Start Menu! This will work in both Home and Professional editions.
[Top]
Turn Off IE Clicking Noise
Microsoft has added an audible clicking sound when activating a link. If you become annoyed by this clicking sound after awhile, you can turn it off. Here's how:
Start>> Control Panel>> Sounds and Audio Devices.
Select the Sound tab.
Scroll down to the section for Windows Explorer.
Click the event called "Start Navigation," and change the setting to "none" from the dropdown box.
Click OK to apply the change.
No To All Option
We all have seen the "Yes To All" option when saving files. Have you ever needed a "No To All" option? This is an undocumented feature, but it does exist. All you need to do is hold down the SHIFT key and click the No button. This will tell Windows Explorer "No To All".
New Programs Highlight in Start Menu
By default, a new program that is loaded to your system, Windows XP highlights it in the Start Menu so that it can be easily found. If you find this annoying and would like to stop the new program from automatically being highlighted, here's how:
Right click the Start button
Select Properties
Choose the Start Menu tab and then click the Customize button
In the Customize Start Menu window, click the Advanced tab
Under 'Start Menu Settings' uncheck the "Highlight newly installed programs" entry
Turn Off Autoeject
When burning a CD and the data-writing is complete, Windows will automatically eject your CD. If this is an annoying feature to you, it can easily be disabled. Here's how:
Go to Start>> My Computer
Right click the appropriate CD/DVD drive, then select Properties
Select the Recording tab, then uncheck "Automatically Eject The CD After Writing"
Click OK (it may be necessary for you to reboot your system for this to take effect)
Enable CD burning service
Windows XP gives you the ability to burn CDs without adding additional software. However, this feature isn't enabled by default. Here's how to start the service:
Go to Start>> Administrative Tools>> Services.
Right-click IMAPI CD-Burning COM Service, then choose Properties.
Change the Startup Type to Automatic.
Select Start>> click OK.
Reboot your system
To burn files to a CD-R or CD-RW, individually select the desired files and/or folders and drag them to the CD burner device. Right-click the device, and choose Write These Files To CD. To empty the burn queue, simply right click the device and choose Delete temporary Files. IMAPI: Image Mastering Applications Programming Interface
Switch Users without the Welcome Screen
If you would like to switch users quickly without going through the welcome screen to do it, here's an alternate method:
Press CTRL + ALT + Delete on your keyboard to access the Task Manager
Click the User tab
Right click the user you would like to switch to and then select Connect from the resulting menu.
Disable password when returning from Standby
When resuming from hibernation or Standby mode, you can bypass the password prompt by going to:
Start>> Control Panel>> Power Options>> Advanced tab>> Uncheck the entry "Prompt for password when computer resumes from standby".
Arrange two windows side-by-side
If you would like to arrange two windows side-by-side, just click the taskbar button of one of the windows, then right click on the taskbar button of the second windows and select "Tile Vertically" from the resulting menu.
Remove shortcut arrow from desktop icons
If you would like to remove the shortcut arrows from your desktop icons, here's how:
Warning: The following tip requires a registry edit. Mistakes made in the Windows registry can cause serious problems with your operating system. Be sure to make a backup copy of your registry prior to making any changes.
Go to Start>> Run. Type in: regedit [Enter] or click OK.
Drill down to the following registry key:
HKEY_CLASSES_ROOT\lnkfile
Delete the IsShortcut registry value.
Note: This may require a system restart.
Do Not Highlight Newly Installed Programs
If you would like to turn off the popup that alerts you to newly installed software, here's how:
Right click the Start button>> Properties>> Start Menu tab>> Customize button.
Click the Advanced tab.
Under the "Start menu settings" category, uncheck the entry titled "Highlight newly installed programs".
Click OK, then OK once again.
Local Group Policy Editor
(Professional Edition only)
Hidden within your hard drive is a very powerful tool that will allow you to modify virtually every feature in Windows XP. It's called Local Group Policy Editor (gpedit). To invoke this tool:
Go to Start>> Run. Type in: gpedit.msc [Enter] or click OK.
Keep Favorites At The Top Of Start Menu
If you have a certain program that you use frequently and would like to be able to find it quickly and easily. Just pin it to your Start Menu where it can be found in one click. Here's how:
Locate the program that you would like to pin to the start menu.
Right click the program and select "Pin to Start Menu" from the resulting menu.
It will now permanently reside in the top left pane of your Start Menu. To remove this item from the Start Menu, just right click it and select Delete.
[Top]
Change the Registered Owner information
When you install Windows XP, you are requested to enter your name and organization (optional) information. This registration information can be viewed here:
Go to Start>> Control Panel>> System>> General tab.
If you need to change this information after Windows has been set up, it will be necessary to change it in the Windows registry.
Caution: Prior to making changes in the Windows registry, be sure to make a backup copy. Making errors while following this information can create serious problems in your Windows installation. Continue at your own risk.
Change the Registered Owner information in Windows XP:
Click Start>> Run. Type in: regedit [Enter]
Drill down to the following registry key:
HKEY_LOCAL_MACHINE\SOFTWARE\Microsoft\Windows NT\CurrentVersion
Single click the "CurrentVersion" entry to empty its contents into the right pane.
In the right pane, locate and double click the entry "RegisteredOrganization".
Under the "Value data" type the new name that you would like to use. Click OK.
Go to File at the top and click Exit.
Launch a program minimized or maximized
Windows XP lets you choose how you would like to display a program when launched. The choices you have are:
Minimized
Maximized
Normal
Here is how you can apply this setting:
Go to Start
Right click the program that you would like to launch
Select Properties from the resulting window
Select the Shortcut tab
Open the pull down menu in the "Run:" text box
Select the window launch option, then click OK
Your program will now launch the way that you have pre-selected.
Create a customized default user profile
When you logon to Windows XP for the first time, Windows uses a template to store the information you have inputted to customize your Windows XP experience. However, if multiple users would like to have their own customized profile on the same machine, you would need to modify the default user profile to accommodate these new users.
Warning: Be careful when editing the default user profile. The change is permanent, so it is a good idea to make a backup copy of it so that it can easily be returned to its original configuration in the event something goes wrong.
How to create the customized default user profile:
Logon as Administrator, then create a local user account.
Note: Many of the files in the profile are hidden by default, you may need to turn on the option for showing hidden files and folders, here's how:
Go to Start>> My Computer>> Tools>> Folder Options.
Click the View tab
Under Advanced settings, click the Show Hidden files and folders option.
Click OK.
Logoff of the Administrator account, then log back on using the local account information that you've just created.
Note: Step #2 is important because if you change the default user profile while logged on as Administrator, you will cause permission issues.
Go to Start>> My Computer>> Local Drive (usually C:/) >> Documents and Settings>> Default User.
Modify the Template settings as you wish. This will make all new users share the same default settings.
Logoff the system, then log back on as Administrator.
You will now need to replace the current default user profile with the one that you have just created, here's how:
Go to Start>> Control Panel>> System>> Advanced tab
Under User Profiles, click the Settings button.
Under Profiles stored on this computer, click the profile that you've just created. Then, click the "Copy To" button.
In the "Copy To" window and under the "Copy profile to" option, click the Browse button.
In the "Browse doe Folder window, find your default user folder (C:\Documents and Settings\Default User folder)
Click OK.
Back in the "Copy To" window and under the "Permitted to use" option, click the Change button.
In the resulting window, click Everyone and then click OK.
Note: If the "Everyone" option is not listed, choose the Advanced option, then click "Find Now". You should now see the Everyone option. Click OK.
Now, when a new user logs on to the computer, Windows XP will use the customized default user profile.
Note: This template folder can be copied to any Windows XP based machine.
Disable New Programs Installed message
Right click the Start button
Select Properties
Choose Customize
Click the Advanced tab
In the Start menu settings category, uncheck the entry titled: Highlight newly installed programs
Click OK
Enable ClearType
Microsoft states, "With Windows XP, ClearType delivers improved font display resolution over traditional anti-aliasing. It improves readability on color LCD monitors with a digital interface, such as those in laptops and high-quality flat desktop displays. Readability on CRT screens can also be somewhat improved."
Here is a are the steps to enable ClearType for Windows XP:
Right click on the desktop and select Properties
Click on the Appearance tab.
Click on the Effects button.
Put a check on the Use the following methods to smooth edges of screen fonts.
Change the value from standard to ClearType.
Open up IE and you will see a difference.
Disable Caps Lock
To disable the caps lock, follow the instructions below:
Open Notepad and insert the following information:
====Begin cut-and-paste (omit this line)
Windows Registry Editor Version 5.00
[HKEY_LOCAL_MACHINE\SYSTEM\CurrentControlSet\Contro l\Keyboard Layout]
"ScanCode Map"=hex:00,00,00,00,00,00,00,00,02,00,00,00,00,00,3a, 00,00,00,00,00
====End cut-and-paste (omit this line)
Save the file to your desktop and name it; DisableCapsLock.reg
To insert the information contained in this file, right-click and select "merge" or simply double-click the file. You must either restart your system or log off and back on again before the system will recognize the new mapping data.
You can delete the file from your desktop is you wish by simply right clicking and select Delete.
Note: Do not use if you've already remapped other keys, because you'll lose those remappings!
Works in Windows XP and 2000 only.
Assign a Keyboard Shortcut
This tip provides instruction on how to create a keyboard shortcut for a program in Windows XP. This feature works only with program shortcuts on the desktop or the Start menu. This feature does not work if the desktop shortcut is a shortcut to another shortcut.
Right-click the desktop or start menu shortcut, and then click Properties.
On the Shortcut tab, click in the Shortcut Key box.
Press the keyboard combination that you want to use to start the program. The shortcut combination must consist of one character (a letter, number, or symbol) plus at least two of the following three keys: CTRL, ALT, and SHIFT.
Click Apply then OK.
Note: The default combination is CTRL+ALT; if you press only a character key, Windows XP automatically adds CTRL+ALT. To use other combinations of the three required keys, press those keys before you press the character key. A keyboard shortcut does not work if it conflicts with a keyboard combination that is used in the program that is currently active.
Customize the Windows XP Start Menu
Windows XP makes it possible to keep your favorite programs within easy to find within the Start Menu. For those programs that you use a lot, you will not have to search through your favorites to find them, just simply Pin them to your Start Menu.
A handy tool to have pinned to the Start Menu is the Windows XP Calculator. So, let's use that as our example for today's tip.
To pin Calculator to the Start menu:
1. Click Start, and then click All Programs.
2. Click Accessories and point to Calculator.
3. Right-click Calculator and click Pin to Start menu.
4. Click anywhere on the desktop to quit the Start menu.
That's it! This method will work for any program on your computer.
To remove the Calculator from your Start Menu:
1. Go to Start
2. Right-click Calculator and select Unpin from Start menu.
3. Click anywhere on the desktop to quit the Start menu.
Use your own picture for your User Account
If there are multiple user accounts on your computer. Windows makes it easy for your to use your own picture to be associated with your user account. Here's how:
Go to Start>> Control Panel>> User Accounts
Select your account from the User Accounts window
You should be at the User Accounts windows that asks the question; "What do you want to change about your account? Select the "Change my picture" link.
At the "Pick a new picture for your account" window, Select "Browse for more pictures"
Navigate to the picture that you would like to use, then select "Open"
The selected graphic will now appear on the Welcome Screen and Start Menu.
Alphabetize Your All Programs Menu
Have you ever searched your programs menu and found it difficult to find what you're looking for? That's pretty common. We all enjoy finding new programs and using them on our computers. The problem is that when you load lots of them, it can be very difficult finding them in the All Programs menu. It may help if you alphabetize the All Programs menu, here's how:
Go to Start>> All Programs
Right click any of the listed programs
From the resulting right click menu, select "Sort By Names"
All of your programs will now be alphabetically sorted.
Remap Your Keyboard
If you would like to make a certain key function like a different key, you can use this simple little utility (below) to drag and drop your keyboard function changes. For example; you would like to make the Page Down key function as a Tab key. Not a problem, drag and drop the Tab key from the upper base keyboard layout down to the Page Down key in the remapped layout. Press the Save and Exit icon in the toolbar. You will then be prompted to make the change in your Windows registry and then reboot.
Note: As always, prior to making changes to your registry, be sure to back it up.
NT/XP/2000
340KB
Customize the Start menu
The start menu is much more customizable than previous versions of Windows. To make the Start menu display only the applications you want, rather than the default determined by Microsoft:
Right-click in an empty section of the Start menu's left column
Select Properties >> Start Menu >> Customize.
Here you'll find a list of your most frequently used programs. (XP keeps track of what you use and what you don't, then updates this list dynamically.)
Note: Don't want your anyone to know that Pinball, Solitaire, and Quake all make your list? Go to the General tab, click Clear List, and set the counter to zero.
Alphabetize your Start Menu
Windows by default, adds new programs to the end of the start menu. If you would rather view these in alphabetical order, just simply right click the menu and chose "sort by name".
Change Mouse Pointer Scheme
If you would like to see your mouse pointer as something other than an arrow or hourglass, then you will appreciate to know that XP offers a number of alternative pointer schemes, such as Dinosaur, Ocean and Sports.
Open the Control Panel, double-click Mouse, and select the Pointers tab. (If you start in Category view, select Appearance and Themes, then click Mouse Pointers under "See Also.") Next to Schemes, click the down arrow and select a scheme to preview its pointers. Click OK to apply the scheme to your desktop.
Quick Date & Time Insert
This is a very handy method of inserting the date and time (according to the Windows calendar) into a text document. I believe this only works in Notepad, not in MS Word or WordPad.
Steps to insert date and time into a Notepad .txt file:
Click Start>> Run
Type: notepad
Push F5 on your keyboard
This simple shortcut can be very useful, especially when making logs or recording any kind of time-sensitive observations.
Pin Items to Start Menu
In the Start Menu, programs will rotate in and out depending on their frequency of use. If you would like to keep a program in the Start Menu:
Right-click the link to your favorite program on the Start Menu and select Pin to Start Menu. Your program will be moved permanently to the top part of the list, just below your browser and e-mail programs.
Change Default Sounds
Are you getting tired of hearing the same sounds that came with your Windows installation? You don't have to settle for the default sounds. You can change the sounds that are associated with certain events such as; logging in, logging out, mail notification and much more. Here's how:
Go to Start>> Control Panel>> Sound and Audio Device>> Sound tab. Scroll the list of events for one that you would like to change, then browse for a sound that you would like to apply to that event. It's as simple as that!
Turn ToggleKeys On
When the ToggleKey feature is activated, you will be given a beep sound to let you know that either the Numlock, Capslock or ScrollLock keys have been pressed. Turn this feature on by pressing and holding the NumLock button on your keyboard for 5 seconds. You will hear a beep to let you know that it is on. Turn it off the same way.
Expand Control Panel in the Start Menu
Windows XP makes it possible to view your Control Panel in a separate window (default) or your can view in in a sub-menu or choose not to have it listed in the Control Panel at all. Here's how:
Right-click the Start menu button, then choose Properties. From the Taskbar & Start Menu Properties window, click the Customize button, then click the Advanced tab. You should see three options for Control Panel:
Display as Link: (default)
Display as Menu: When you click it, or hold the mouse over it, the Control Panel items will open as a sub-menu.
Do not display this item: This will remove it from the Start Menu completely.
Or, if you want to view the Control Panel in a separate window, just right-click Control Panel and select Open. The Control Panel will now open in a new window and the behavior of your Start Menu will be unchanged.
Change The Text In The XP Start Button
I have made these instructions available due to the many requests I have received. Note: Use the information below at your own risk, please see the "Terms of use" section (link below). This modification is not recommended for the beginner.
Changing the text in the XP start button is done by modifying the Explorer.exe file. In order to modify this file you will need a special editor equipped to handle binary files. A commonly referred editor is Resource Hacker. Resource Hacker is a freeware utility that has the ability to view, modify, rename, add, delete and extract resources in 32bit Windows executables and resource files. It works with Win95, Win98, WinME, WinNT, Win2000 and WinXP Operating Systems. Click the button below to download Resource Hacker.
First, make a backup copy of Explorer.exe located at C:\Windows\explorer. You can place it in a special folder or save it to a disk. An alternate plan is to rename the file to "explorerB.exe" (the B is for backup), then just simply edit Explorer.exe.
Next, open Resource Hacker. The category you will be using is String Table. You will need to expand it by clicking on the plus sign, then navigate down and expand string 37 followed by 1033, (For Classic Layout use number 38). On the right hand pane look for item 578, it will show the word "start". Now, let's modify the file.
Double click on "Start" so that it is highlighted. This should highlight ONLY the word Start and NOT the quotation marks. It is important to leave the quotation marks in tact. The new text will go in-between the quotation marks. As an example:
Current name= "Start"
Deleted name= ""
Modification= "5Star"
Note: Using 5 digits or less in the Start button is best, however, many people have had success using more than that. I don't recommend using more that ten digits for your modified Start button text.
After changing the "Start" text, you will need to click on the Compile Script button. Go to the File menu and choose the "Save as" command. Give the file a name such as "explorerN.exe" (the N is for new). Save this file to C:\Windows.
Next, you will need to make a Windows registry change so that your newly modified explorer.exe file will be recognized when you logon to your system. Here's how:
Go to the Start>> Run. Type in: regedit [Enter]
Drill to the following registry key: HKEY_LOCAL_MACHINE\Software\Microsoft\Windows NT\CurrentVersion\Winlogon. Click once on the "Winlogon" entry to empty its contents into the right pane. In the right pane, double click the "Shell" entry to open the Edit String dialog box. In the "Value data" line, type in your Start Menu button's modified name (in this example we used "5Star"). Click OK.
Close the Registry Editor and restart Windows. If you have followed the instructions (above) carefully, your Start button should have its new name.
Warning: Shell modifications may be identified as spyware by Ad-aware. Deleting this file in Ad-aware could cause Windows not to start. Also, running the update to SP2 with the modified Shell has been reported to render your computer unusable. If you run in to any trouble using this modification, revert back to your original version of your explorer.exe file.
Windows XP ClickLock Feature
If you are doing a lot of drag and drop of files and folders, you may want to consider using the ClickLock feature available in Windows XP. With this feature activated, you can left click and hold the click for a determined amount of time until the item that was clicked is locked. Then just release the left click and move your mouse to the location where you would like to drop the item, left click again and it will be dropped in to this new location. Here is how to activate the ClickLock feature:
Go to Start>> Control Panel>> Mouse Icon. You will then see the illustration shown below. In the Mouse Properties window, click the "Buttons" tab. Then, place a check mark in the little check box titled "Turn on ClickLock". Once this is checked it will activate the "Settings" button. By clicking the settings button, you will be able to control the speed in which it takes Windows to lock on to the selected item. It defaults in the center position and in most cases, this is fine.
Access your favorite programs fast
Windows makes it possible to access your favorite programs with a keyboard command. This is very helpful when you have a window open and you need to access a certain program quickly and you don't want to go to your desktop to access it. Here's how to set this up:
Right click any program, either in All Programs or on your Desktop.
Select Properties from the resulting menu.
Click the Shortcut tab.
In your programs Properties window, you will find the word "None" list in the Shortcut key text box.
Click once inside this text box and choose a letter on your keyboard that you would like to associate with your program (see Figure #1). In my case I chose the letter "F". Windows will automatically insert Ctrl + Alt + F into the text box making this your new keyboard shortcut command.
Click Apply and exit the Properties window.
Now whenever I use Ctrl + Alt + F on my keyboard, the chosen program will automatically launch.
Save Custom Colors & Patterns
If you enjoy creating custom colors and patterns for your Windows installation, you know that creating this takes a great deal of time. If you would like to save these settings to keep as a backup copy or transferring these settings to a second computer here's how:
Open up the Registry Editor, Start>> Run, type in: regedit [Enter]
Drill to the following two registry keys:
HKEY_CURRENT_USER\Control Panel\Custom Colors
HKEY_CURRENT_USER\Control Panel\Patterns
Right click Custom Colors and select Export from the resulting menu. Choose a location to save it to and click Save. Do the same for the "Patterns" entry.
Once you copy the file to the second computer, just double click the file to import.
Rename IE's Title Bar
If you would like to see a new name for Internet Explorer in its title bar, here's how:
Go to: Start >> Run
Type in: REGEDIT
Navigate to: HKEY_CURRENT_USER\Software\Microsoft\Internet Explorer\Main
Single click on "Main" to view its contents in the right pane. Scroll down and check to see if an entry "Window Title" exists. If it does not exist, then go up to Edit >> New>> String Value.
Right click on your new String Value entry and select "Modify" in the resulting menu.
In the "Value data" text box, type in whatever you would like the title bar to read, select OK when done. I have mine named "5 Star Support Explorer".
If you have done this correctly, the next time you open up Internet Explorer, you should see your new name at the title bar.
Note: Be sure to back up your registry prior to making any changes.
Installing Fonts
Windows comes with a great deal of different fonts selections, but there are those of you that need more. Windows makes it easy to add new fonts to your system.
Once you have downloaded your font of choice:
Go to Start>> Control Panel.
Double-click the Fonts icon. If the Fonts icon is not visible, you may need to click Appearance and Themes first. Then go to "See Also" in the upper left of your screen.
Once you get to your Fonts window, you can either drag and drop your new font from its downloaded location into the Font window or, you can click on the File menu in the upper left of the Fonts window and select "Install New Font...". From here, you can browse to the new font location, click the font file and click OK. The font will automatically be copied into your Fonts folder.
Your new font will now be available for all Windows applications to use.
Launch the On-Screen Keyboard
Microsoft's on-screen keyboard utility is a virtual keyboard that allows people with mobility impairments to use the on-screen keyboard via a mouse or joystick.
To access the on-screen keyboard:
Go to Start>> Run. Type in: OSK [Enter] or click OK.
The on-screen keyboard will now be displayed at the bottom of your screen. You can move it anywhere you would like just as you can with any other window.
Once you have the on-screen keyboard displayed, you can click the "Keyboard" button and select the type of keyboard to be displayed (see figure #1).
Then, click the "Settings" button to select the mode you would like it to operate in
Quickly Close All Windows
If you have several windows open and you would like to close them quickly, you can hold down the CTRL button while clicking each taskbar button. With all of the buttons selected, right click the last button clicked and select "Close Group" (see illustration below).
Change Your Pointer Scheme
The default scheme for the Windows busy pointer is the hourglass. If you would like to change the default scheme to any of the available alternatives, such as:
Dinosaur
Ocean
Sports
...plus many more
Here's how:
Go to Start>> Control Panel>> Mouse>> Pointers tab
Next to Schemes, click the drop-down arrow and select a scheme to preview its pointers.
Click OK to apply the scheme of choice to your desktop.
Create a Shortcut to Lock Your System
In the event you should need to leave your computer system in a hurry and do not want others to be able to access your information. You can create a shortcut to sit on your desktop so that all you would have to do is double click this shortcut and your computer will automatically lock your display. This will not log-off your system. In order to unlock your computer, simply click your "User Name", enter your password and your back in business. Here's how to set this up:
Right click an empty area of your Desktop.
Select New>> Shortcut.
The Shortcut wizard will activate. Type the following exactly as is in to the "Type the location of the item:" text box:
rundll32.exe user32.dll,LockWorkStation
Note: It may be best to copy and paste the command (above) for accuracy sake.
Click Next
Enter a name for your new shortcut (eg: Lock System).
Click Finish
Alternately, you can always just press the Windows key + "L" on your keyboard which will do the very same thing. Some people just like having the shortcut to click.
Now that you have the Shortcut residing on your Desktop. You can change the actual icon to something other than the default icon. Here's how:
Right click the new shortcut on your Desktop.
Select Properties.
Select the Shortcut tab
Click the Change Icon button.
In the textbox titled: "Look for icons in this file", type in: shell32.dll
Click OK
Click any of the available icons from the list.
Click OK
Classic Start Menu
If you prefer to have your system Icons on the Desktop rather than having many of them in your Start Menu, then here's how to get the Classic Start Menu on your XP system.
Right-click the Start Menu and choose Properties. The "Taskbar and Start Menu Properties" window should appear.
In the bottom half of the window, select "Classic Start Menu" and then click OK or Apply, and you should see the old familiar Start Menu.
Full Screen feature
The Windows Full Screen Feature is very helpful when you are in search of a file within a very large folder. For instance, when you open your My Documents folder, press the F11 key on your keyboard to activate the Full Screen Feature. This will make the whole folder viewable within the screen instead of having to scroll down in search of your file. To revert back to your regular screen, just press the F11 key again.
If you would like to remove the help and support link from the Start Menu, here's how:
Right click the Taskbar
Choose Properties
In the Taskbar and Start Menu Properties window, select the Start Menu tab
Click the Customize button
In the Customize Start Menu window, choose the Advanced tab
Uncheck the Help and Support option (see image below)
Click OK, then OK again to exit the Taskbar and Start Menu Properties window
Adding an item to the Send To menu
If you would like to add an additional item to your Send To menu, you need to add a shortcut to the SendTo folder. Here's how:
Go to Start>> Run. Type in: sendto [Enter]
Right click a blank space within the SendTo folder.
Click New>> Shortcut.
Follow the Create Short Cut wizards onscreen instructions to create a new shortcut.
Close the SendTo folder window.
This newly created shortcut will now appear in your Send To menu.
To delete a shortcut from the Send To menu:
Go to Start>> Run: Type in: sendto [Enter]
Find the item that you would like to delete.
Right click the item and select Delete.
Clear unwanted items from the "Open With" list
When you right click a file, you may see an option called 'Open With', which lists a number of programs on your computer to open that file with. If you would like to remove some of these options from this list, here's how:
Warning: The following tip involves editing the Windows Registry. Please make sure that you make a backup copy of the registry prior to making any changes.
Go to Start>> Run. Type in: REGEDIT [Enter] or Click OK.
Navigate to the following key:
HKEY_CURRENT_USER \ Software \ Microsoft \ Windows \ CurrentVersion \ Explorer \ FileExts
Click once on the 'FileExts' entry to empty its contents into the right pane.
Find the extension you wish to edit and click on the "+" sign to expand OpenWithList (see Figure #1)
Right click on the one that you would like to delete, then select Delete.
Note: Deleting the item from the above registry key may not remove it from the Open With list. Some items may still reside in the HKEY_CLASSES_ROOT registry key which is common for all user profiles.
Navigate to the following registry key: HKEY_CLASSES_ROOT\ .xxx \ OpenWithList (Where .xxx is a file extension)
When you find the desired entry, right click and select Delete.
Adding a special character
If you ever find the need to use a special character such as; ® or ©. Instead of opening up your character map each time you need to insert one of these symbols, there are shortcuts available that can be a great time saver. Here's how:
Go to Start>> All Programs>> Accessories>> System Tools>> Character Map.
Click the © symbol
At the bottom right corner, you will notice the keyboard shortcut used to insert this character. Be sure to write it down for future use.
To insert the character using the keyboard shortcut:
Position the cursor where you would like to insert the special character.
With NUM LOCK key on, hold down the ALT key and use the number pad keys to type the character value.
Move The Cursor Without A Mouse
If you would like to try out using your mouse with only your keyboard, Windows makes this option available to you. The utility is called MouseKeys. MouseKeys uses your numeric keypad to control the mouse cursor. This can be a handy feature if you are needing better accuracy while designing graphics. MouseKeys allows you to move the cursor pixel by pixel across the screen. Here is how to activate the MouseKeys feature:
Go to Start>> Control Panel>> Accessibility Options
Click the Mouse tab
Place a checkmark in the box titled: Use MouseKeys
Click the settings button to adjust the pointer speed
Click OK
Now you can use your numeric keypad to control your mouse cursor.
Unhide Components in Add/Remove Programs
You can uninstall many Windows components using the Add or Remove Programs.
Go to Start>> Control Panel>> Add/Remove Programs
While searching for old programs to delete from your system, you'll probably notice that some components are not there. Well, they really are there, Windows just has them hidden. The most common Windows program that is hidden and marked for removal by many PC users is MSN Messenger. Here's how you can tell Windows not to hide these components.
Go to Start>> Run. Type in: notepad.exe C:\windows\inf\sysoc.inf
In notepad, select Edit from the toolbar.
Click the Replace button.
In the "Find What" text area type HIDE
Leave the "Replace With" text area blank.
Click Replace All.
Exit the Replace window.
In notepad again, select File from the toolbar and click Save.
All of the hidden Windows components will now be visible in Add/Remove programs.
Brand XP
My new HP came loaded with an OEM version of XP on it. I noticed that they had their own icon under Run in the start menu. If you would like to brand your PC with your own clickable icon that will take you wherever you would like to go (eg: website, program), just follow the simple instructions below:
Note: This involves a registry tweak, please take all precautions by backing up your registry prior to making any changes to it.
Start up Notepad and insert the following information via copy and paste:
Windows Registry Editor Version 5.00
[HKEY_CLASSES_ROOT\CLSID\{2559a1f6-21d7-11d4-bdaf-00c04f60b9f0}]
@="YOUR TITLE HERE"
[HKEY_CLASSES_ROOT\CLSID\{2559a1f6-21d7-11d4-bdaf-00c04f60b9f0}\DefaultIcon]
@="YOUR ICON HERE"
[HKEY_CLASSES_ROOT\CLSID\{2559a1f6-21d7-11d4-bdaf-00c04f60b9f0}\InProcServer32]
@=hex(2):25,00,53,00,79,00,73,00,74,00,65,00,6d,00 ,52,00,6f,00,6f,00,74,00,25,\
00,5c,00,73,00,79,00,73,00,74,00,65,00,6d,00,33,00 ,32,00,5c,00,73,00,68,00,\
64,00,6f,00,63,00,76,00,77,00,2e,00,64,00,6c,00,6c ,00,00,00
"ThreadingModel"="Apartment"
[HKEY_CLASSES_ROOT\CLSID\{2559a1f6-21d7-11d4-bdaf-00c04f60b9f0}\Instance]
"CLSID"="{3f454f0e-42ae-4d7c-8ea3-328250d6e272}"
[HKEY_CLASSES_ROOT\CLSID\{2559a1f6-21d7-11d4-bdaf-00c04f60b9f0}\Instance\InitPropertyBag]
"CLSID"="{13709620-C279-11CE-A49E-444553540000}"
"method"="ShellExecute"
"Command"="YOUR TITLE HERE"
"Param1"="YOUR FUNCTION HERE"
[HKEY_CLASSES_ROOT\CLSID\{2559a1f6-21d7-11d4-bdaf-00c04f60b9f0}\shellex]
[HKEY_CLASSES_ROOT\CLSID\{2559a1f6-21d7-11d4-bdaf-00c04f60b9f0}\shellex\ContextMenuHandlers]
[HKEY_CLASSES_ROOT\CLSID\{2559a1f6-21d7-11d4-bdaf-00c04f60b9f0}\shellex\ContextMenuHandlers\{2559a1f 6-21d7-11d4-bdaf-00c04f60b9f0}]
@=""
[HKEY_CLASSES_ROOT\CLSID\{2559a1f6-21d7-11d4-bdaf-00c04f60b9f0}\shellex\MayChangeDefaultMenu]
@=""
[HKEY_CLASSES_ROOT\CLSID\{2559a1f6-21d7-11d4-bdaf-00c04f60b9f0}\ShellFolder]
"Attributes"=dword:00000000
Edit where it says YOUR ICON HERE to a path to an icon (ex. c:\\5staricon.ico), it must be 24x24 pixels and in *.ico format. Use double back slash for path names.
Edit both places where it says YOUR TITLE HERE to what you want it to say in the Start Menu (eg: 5 Star Support).
Edit where it says YOUR FUNCTION here to what you want it to do when you click it, it can be anything... your website, a local HTML document, a program, a Windows function, whatever your imagination can provide (eg:
CODE: SELECT ALL
Code:
http://www.5starsupport.com/
).
Save this file as brand.reg, double-click it to enter in your information into the registry then refresh Explorer (log off/on) to see it in the Start Menu! This will work in both Home and Professional editions.
[Top]
Turn Off IE Clicking Noise
Microsoft has added an audible clicking sound when activating a link. If you become annoyed by this clicking sound after awhile, you can turn it off. Here's how:
Start>> Control Panel>> Sounds and Audio Devices.
Select the Sound tab.
Scroll down to the section for Windows Explorer.
Click the event called "Start Navigation," and change the setting to "none" from the dropdown box.
Click OK to apply the change.
No To All Option
We all have seen the "Yes To All" option when saving files. Have you ever needed a "No To All" option? This is an undocumented feature, but it does exist. All you need to do is hold down the SHIFT key and click the No button. This will tell Windows Explorer "No To All".
New Programs Highlight in Start Menu
By default, a new program that is loaded to your system, Windows XP highlights it in the Start Menu so that it can be easily found. If you find this annoying and would like to stop the new program from automatically being highlighted, here's how:
Right click the Start button
Select Properties
Choose the Start Menu tab and then click the Customize button
In the Customize Start Menu window, click the Advanced tab
Under 'Start Menu Settings' uncheck the "Highlight newly installed programs" entry
Turn Off Autoeject
When burning a CD and the data-writing is complete, Windows will automatically eject your CD. If this is an annoying feature to you, it can easily be disabled. Here's how:
Go to Start>> My Computer
Right click the appropriate CD/DVD drive, then select Properties
Select the Recording tab, then uncheck "Automatically Eject The CD After Writing"
Click OK (it may be necessary for you to reboot your system for this to take effect)
Enable CD burning service
Windows XP gives you the ability to burn CDs without adding additional software. However, this feature isn't enabled by default. Here's how to start the service:
Go to Start>> Administrative Tools>> Services.
Right-click IMAPI CD-Burning COM Service, then choose Properties.
Change the Startup Type to Automatic.
Select Start>> click OK.
Reboot your system
To burn files to a CD-R or CD-RW, individually select the desired files and/or folders and drag them to the CD burner device. Right-click the device, and choose Write These Files To CD. To empty the burn queue, simply right click the device and choose Delete temporary Files. IMAPI: Image Mastering Applications Programming Interface
Switch Users without the Welcome Screen
If you would like to switch users quickly without going through the welcome screen to do it, here's an alternate method:
Press CTRL + ALT + Delete on your keyboard to access the Task Manager
Click the User tab
Right click the user you would like to switch to and then select Connect from the resulting menu.
Disable password when returning from Standby
When resuming from hibernation or Standby mode, you can bypass the password prompt by going to:
Start>> Control Panel>> Power Options>> Advanced tab>> Uncheck the entry "Prompt for password when computer resumes from standby".
Arrange two windows side-by-side
If you would like to arrange two windows side-by-side, just click the taskbar button of one of the windows, then right click on the taskbar button of the second windows and select "Tile Vertically" from the resulting menu.
Remove shortcut arrow from desktop icons
If you would like to remove the shortcut arrows from your desktop icons, here's how:
Warning: The following tip requires a registry edit. Mistakes made in the Windows registry can cause serious problems with your operating system. Be sure to make a backup copy of your registry prior to making any changes.
Go to Start>> Run. Type in: regedit [Enter] or click OK.
Drill down to the following registry key:
HKEY_CLASSES_ROOT\lnkfile
Delete the IsShortcut registry value.
Note: This may require a system restart.
Do Not Highlight Newly Installed Programs
If you would like to turn off the popup that alerts you to newly installed software, here's how:
Right click the Start button>> Properties>> Start Menu tab>> Customize button.
Click the Advanced tab.
Under the "Start menu settings" category, uncheck the entry titled "Highlight newly installed programs".
Click OK, then OK once again.
Local Group Policy Editor
(Professional Edition only)
Hidden within your hard drive is a very powerful tool that will allow you to modify virtually every feature in Windows XP. It's called Local Group Policy Editor (gpedit). To invoke this tool:
Go to Start>> Run. Type in: gpedit.msc [Enter] or click OK.
Keep Favorites At The Top Of Start Menu
If you have a certain program that you use frequently and would like to be able to find it quickly and easily. Just pin it to your Start Menu where it can be found in one click. Here's how:
Locate the program that you would like to pin to the start menu.
Right click the program and select "Pin to Start Menu" from the resulting menu.
It will now permanently reside in the top left pane of your Start Menu. To remove this item from the Start Menu, just right click it and select Delete.
[Top]
Change the Registered Owner information
When you install Windows XP, you are requested to enter your name and organization (optional) information. This registration information can be viewed here:
Go to Start>> Control Panel>> System>> General tab.
If you need to change this information after Windows has been set up, it will be necessary to change it in the Windows registry.
Caution: Prior to making changes in the Windows registry, be sure to make a backup copy. Making errors while following this information can create serious problems in your Windows installation. Continue at your own risk.
Change the Registered Owner information in Windows XP:
Click Start>> Run. Type in: regedit [Enter]
Drill down to the following registry key:
HKEY_LOCAL_MACHINE\SOFTWARE\Microsoft\Windows NT\CurrentVersion
Single click the "CurrentVersion" entry to empty its contents into the right pane.
In the right pane, locate and double click the entry "RegisteredOrganization".
Under the "Value data" type the new name that you would like to use. Click OK.
Go to File at the top and click Exit.
Launch a program minimized or maximized
Windows XP lets you choose how you would like to display a program when launched. The choices you have are:
Minimized
Maximized
Normal
Here is how you can apply this setting:
Go to Start
Right click the program that you would like to launch
Select Properties from the resulting window
Select the Shortcut tab
Open the pull down menu in the "Run:" text box
Select the window launch option, then click OK
Your program will now launch the way that you have pre-selected.
Create a customized default user profile
When you logon to Windows XP for the first time, Windows uses a template to store the information you have inputted to customize your Windows XP experience. However, if multiple users would like to have their own customized profile on the same machine, you would need to modify the default user profile to accommodate these new users.
Warning: Be careful when editing the default user profile. The change is permanent, so it is a good idea to make a backup copy of it so that it can easily be returned to its original configuration in the event something goes wrong.
How to create the customized default user profile:
Logon as Administrator, then create a local user account.
Note: Many of the files in the profile are hidden by default, you may need to turn on the option for showing hidden files and folders, here's how:
Go to Start>> My Computer>> Tools>> Folder Options.
Click the View tab
Under Advanced settings, click the Show Hidden files and folders option.
Click OK.
Logoff of the Administrator account, then log back on using the local account information that you've just created.
Note: Step #2 is important because if you change the default user profile while logged on as Administrator, you will cause permission issues.
Go to Start>> My Computer>> Local Drive (usually C:/) >> Documents and Settings>> Default User.
Modify the Template settings as you wish. This will make all new users share the same default settings.
Logoff the system, then log back on as Administrator.
You will now need to replace the current default user profile with the one that you have just created, here's how:
Go to Start>> Control Panel>> System>> Advanced tab
Under User Profiles, click the Settings button.
Under Profiles stored on this computer, click the profile that you've just created. Then, click the "Copy To" button.
In the "Copy To" window and under the "Copy profile to" option, click the Browse button.
In the "Browse doe Folder window, find your default user folder (C:\Documents and Settings\Default User folder)
Click OK.
Back in the "Copy To" window and under the "Permitted to use" option, click the Change button.
In the resulting window, click Everyone and then click OK.
Note: If the "Everyone" option is not listed, choose the Advanced option, then click "Find Now". You should now see the Everyone option. Click OK.
Now, when a new user logs on to the computer, Windows XP will use the customized default user profile.
Note: This template folder can be copied to any Windows XP based machine.
Disable New Programs Installed message
Right click the Start button
Select Properties
Choose Customize
Click the Advanced tab
In the Start menu settings category, uncheck the entry titled: Highlight newly installed programs
Click OK
Enable ClearType
Microsoft states, "With Windows XP, ClearType delivers improved font display resolution over traditional anti-aliasing. It improves readability on color LCD monitors with a digital interface, such as those in laptops and high-quality flat desktop displays. Readability on CRT screens can also be somewhat improved."
Here is a are the steps to enable ClearType for Windows XP:
Right click on the desktop and select Properties
Click on the Appearance tab.
Click on the Effects button.
Put a check on the Use the following methods to smooth edges of screen fonts.
Change the value from standard to ClearType.
Open up IE and you will see a difference.
Disable Caps Lock
To disable the caps lock, follow the instructions below:
Open Notepad and insert the following information:
====Begin cut-and-paste (omit this line)
Windows Registry Editor Version 5.00
[HKEY_LOCAL_MACHINE\SYSTEM\CurrentControlSet\Contro l\Keyboard Layout]
"ScanCode Map"=hex:00,00,00,00,00,00,00,00,02,00,00,00,00,00,3a, 00,00,00,00,00
====End cut-and-paste (omit this line)
Save the file to your desktop and name it; DisableCapsLock.reg
To insert the information contained in this file, right-click and select "merge" or simply double-click the file. You must either restart your system or log off and back on again before the system will recognize the new mapping data.
You can delete the file from your desktop is you wish by simply right clicking and select Delete.
Note: Do not use if you've already remapped other keys, because you'll lose those remappings!
Works in Windows XP and 2000 only.
Assign a Keyboard Shortcut
This tip provides instruction on how to create a keyboard shortcut for a program in Windows XP. This feature works only with program shortcuts on the desktop or the Start menu. This feature does not work if the desktop shortcut is a shortcut to another shortcut.
Right-click the desktop or start menu shortcut, and then click Properties.
On the Shortcut tab, click in the Shortcut Key box.
Press the keyboard combination that you want to use to start the program. The shortcut combination must consist of one character (a letter, number, or symbol) plus at least two of the following three keys: CTRL, ALT, and SHIFT.
Click Apply then OK.
Note: The default combination is CTRL+ALT; if you press only a character key, Windows XP automatically adds CTRL+ALT. To use other combinations of the three required keys, press those keys before you press the character key. A keyboard shortcut does not work if it conflicts with a keyboard combination that is used in the program that is currently active.
Customize the Windows XP Start Menu
Windows XP makes it possible to keep your favorite programs within easy to find within the Start Menu. For those programs that you use a lot, you will not have to search through your favorites to find them, just simply Pin them to your Start Menu.
A handy tool to have pinned to the Start Menu is the Windows XP Calculator. So, let's use that as our example for today's tip.
To pin Calculator to the Start menu:
1. Click Start, and then click All Programs.
2. Click Accessories and point to Calculator.
3. Right-click Calculator and click Pin to Start menu.
4. Click anywhere on the desktop to quit the Start menu.
That's it! This method will work for any program on your computer.
To remove the Calculator from your Start Menu:
1. Go to Start
2. Right-click Calculator and select Unpin from Start menu.
3. Click anywhere on the desktop to quit the Start menu.
Use your own picture for your User Account
If there are multiple user accounts on your computer. Windows makes it easy for your to use your own picture to be associated with your user account. Here's how:
Go to Start>> Control Panel>> User Accounts
Select your account from the User Accounts window
You should be at the User Accounts windows that asks the question; "What do you want to change about your account? Select the "Change my picture" link.
At the "Pick a new picture for your account" window, Select "Browse for more pictures"
Navigate to the picture that you would like to use, then select "Open"
The selected graphic will now appear on the Welcome Screen and Start Menu.
Alphabetize Your All Programs Menu
Have you ever searched your programs menu and found it difficult to find what you're looking for? That's pretty common. We all enjoy finding new programs and using them on our computers. The problem is that when you load lots of them, it can be very difficult finding them in the All Programs menu. It may help if you alphabetize the All Programs menu, here's how:
Go to Start>> All Programs
Right click any of the listed programs
From the resulting right click menu, select "Sort By Names"
All of your programs will now be alphabetically sorted.
Remap Your Keyboard
If you would like to make a certain key function like a different key, you can use this simple little utility (below) to drag and drop your keyboard function changes. For example; you would like to make the Page Down key function as a Tab key. Not a problem, drag and drop the Tab key from the upper base keyboard layout down to the Page Down key in the remapped layout. Press the Save and Exit icon in the toolbar. You will then be prompted to make the change in your Windows registry and then reboot.
Note: As always, prior to making changes to your registry, be sure to back it up.
NT/XP/2000
340KB
Customize the Start menu
The start menu is much more customizable than previous versions of Windows. To make the Start menu display only the applications you want, rather than the default determined by Microsoft:
Right-click in an empty section of the Start menu's left column
Select Properties >> Start Menu >> Customize.
Here you'll find a list of your most frequently used programs. (XP keeps track of what you use and what you don't, then updates this list dynamically.)
Note: Don't want your anyone to know that Pinball, Solitaire, and Quake all make your list? Go to the General tab, click Clear List, and set the counter to zero.
Alphabetize your Start Menu
Windows by default, adds new programs to the end of the start menu. If you would rather view these in alphabetical order, just simply right click the menu and chose "sort by name".
Change Mouse Pointer Scheme
If you would like to see your mouse pointer as something other than an arrow or hourglass, then you will appreciate to know that XP offers a number of alternative pointer schemes, such as Dinosaur, Ocean and Sports.
Open the Control Panel, double-click Mouse, and select the Pointers tab. (If you start in Category view, select Appearance and Themes, then click Mouse Pointers under "See Also.") Next to Schemes, click the down arrow and select a scheme to preview its pointers. Click OK to apply the scheme to your desktop.
Quick Date & Time Insert
This is a very handy method of inserting the date and time (according to the Windows calendar) into a text document. I believe this only works in Notepad, not in MS Word or WordPad.
Steps to insert date and time into a Notepad .txt file:
Click Start>> Run
Type: notepad
Push F5 on your keyboard
This simple shortcut can be very useful, especially when making logs or recording any kind of time-sensitive observations.
Pin Items to Start Menu
In the Start Menu, programs will rotate in and out depending on their frequency of use. If you would like to keep a program in the Start Menu:
Right-click the link to your favorite program on the Start Menu and select Pin to Start Menu. Your program will be moved permanently to the top part of the list, just below your browser and e-mail programs.
Change Default Sounds
Are you getting tired of hearing the same sounds that came with your Windows installation? You don't have to settle for the default sounds. You can change the sounds that are associated with certain events such as; logging in, logging out, mail notification and much more. Here's how:
Go to Start>> Control Panel>> Sound and Audio Device>> Sound tab. Scroll the list of events for one that you would like to change, then browse for a sound that you would like to apply to that event. It's as simple as that!
Turn ToggleKeys On
When the ToggleKey feature is activated, you will be given a beep sound to let you know that either the Numlock, Capslock or ScrollLock keys have been pressed. Turn this feature on by pressing and holding the NumLock button on your keyboard for 5 seconds. You will hear a beep to let you know that it is on. Turn it off the same way.
Expand Control Panel in the Start Menu
Windows XP makes it possible to view your Control Panel in a separate window (default) or your can view in in a sub-menu or choose not to have it listed in the Control Panel at all. Here's how:
Right-click the Start menu button, then choose Properties. From the Taskbar & Start Menu Properties window, click the Customize button, then click the Advanced tab. You should see three options for Control Panel:
Display as Link: (default)
Display as Menu: When you click it, or hold the mouse over it, the Control Panel items will open as a sub-menu.
Do not display this item: This will remove it from the Start Menu completely.
Or, if you want to view the Control Panel in a separate window, just right-click Control Panel and select Open. The Control Panel will now open in a new window and the behavior of your Start Menu will be unchanged.
Change The Text In The XP Start Button
I have made these instructions available due to the many requests I have received. Note: Use the information below at your own risk, please see the "Terms of use" section (link below). This modification is not recommended for the beginner.
Changing the text in the XP start button is done by modifying the Explorer.exe file. In order to modify this file you will need a special editor equipped to handle binary files. A commonly referred editor is Resource Hacker. Resource Hacker is a freeware utility that has the ability to view, modify, rename, add, delete and extract resources in 32bit Windows executables and resource files. It works with Win95, Win98, WinME, WinNT, Win2000 and WinXP Operating Systems. Click the button below to download Resource Hacker.
First, make a backup copy of Explorer.exe located at C:\Windows\explorer. You can place it in a special folder or save it to a disk. An alternate plan is to rename the file to "explorerB.exe" (the B is for backup), then just simply edit Explorer.exe.
Next, open Resource Hacker. The category you will be using is String Table. You will need to expand it by clicking on the plus sign, then navigate down and expand string 37 followed by 1033, (For Classic Layout use number 38). On the right hand pane look for item 578, it will show the word "start". Now, let's modify the file.
Double click on "Start" so that it is highlighted. This should highlight ONLY the word Start and NOT the quotation marks. It is important to leave the quotation marks in tact. The new text will go in-between the quotation marks. As an example:
Current name= "Start"
Deleted name= ""
Modification= "5Star"
Note: Using 5 digits or less in the Start button is best, however, many people have had success using more than that. I don't recommend using more that ten digits for your modified Start button text.
After changing the "Start" text, you will need to click on the Compile Script button. Go to the File menu and choose the "Save as" command. Give the file a name such as "explorerN.exe" (the N is for new). Save this file to C:\Windows.
Next, you will need to make a Windows registry change so that your newly modified explorer.exe file will be recognized when you logon to your system. Here's how:
Go to the Start>> Run. Type in: regedit [Enter]
Drill to the following registry key: HKEY_LOCAL_MACHINE\Software\Microsoft\Windows NT\CurrentVersion\Winlogon. Click once on the "Winlogon" entry to empty its contents into the right pane. In the right pane, double click the "Shell" entry to open the Edit String dialog box. In the "Value data" line, type in your Start Menu button's modified name (in this example we used "5Star"). Click OK.
Close the Registry Editor and restart Windows. If you have followed the instructions (above) carefully, your Start button should have its new name.
Warning: Shell modifications may be identified as spyware by Ad-aware. Deleting this file in Ad-aware could cause Windows not to start. Also, running the update to SP2 with the modified Shell has been reported to render your computer unusable. If you run in to any trouble using this modification, revert back to your original version of your explorer.exe file.
Windows XP ClickLock Feature
If you are doing a lot of drag and drop of files and folders, you may want to consider using the ClickLock feature available in Windows XP. With this feature activated, you can left click and hold the click for a determined amount of time until the item that was clicked is locked. Then just release the left click and move your mouse to the location where you would like to drop the item, left click again and it will be dropped in to this new location. Here is how to activate the ClickLock feature:
Go to Start>> Control Panel>> Mouse Icon. You will then see the illustration shown below. In the Mouse Properties window, click the "Buttons" tab. Then, place a check mark in the little check box titled "Turn on ClickLock". Once this is checked it will activate the "Settings" button. By clicking the settings button, you will be able to control the speed in which it takes Windows to lock on to the selected item. It defaults in the center position and in most cases, this is fine.
Access your favorite programs fast
Windows makes it possible to access your favorite programs with a keyboard command. This is very helpful when you have a window open and you need to access a certain program quickly and you don't want to go to your desktop to access it. Here's how to set this up:
Right click any program, either in All Programs or on your Desktop.
Select Properties from the resulting menu.
Click the Shortcut tab.
In your programs Properties window, you will find the word "None" list in the Shortcut key text box.
Click once inside this text box and choose a letter on your keyboard that you would like to associate with your program (see Figure #1). In my case I chose the letter "F". Windows will automatically insert Ctrl + Alt + F into the text box making this your new keyboard shortcut command.
Click Apply and exit the Properties window.
Now whenever I use Ctrl + Alt + F on my keyboard, the chosen program will automatically launch.
Save Custom Colors & Patterns
If you enjoy creating custom colors and patterns for your Windows installation, you know that creating this takes a great deal of time. If you would like to save these settings to keep as a backup copy or transferring these settings to a second computer here's how:
Open up the Registry Editor, Start>> Run, type in: regedit [Enter]
Drill to the following two registry keys:
HKEY_CURRENT_USER\Control Panel\Custom Colors
HKEY_CURRENT_USER\Control Panel\Patterns
Right click Custom Colors and select Export from the resulting menu. Choose a location to save it to and click Save. Do the same for the "Patterns" entry.
Once you copy the file to the second computer, just double click the file to import.
Rename IE's Title Bar
If you would like to see a new name for Internet Explorer in its title bar, here's how:
Go to: Start >> Run
Type in: REGEDIT
Navigate to: HKEY_CURRENT_USER\Software\Microsoft\Internet Explorer\Main
Single click on "Main" to view its contents in the right pane. Scroll down and check to see if an entry "Window Title" exists. If it does not exist, then go up to Edit >> New>> String Value.
Right click on your new String Value entry and select "Modify" in the resulting menu.
In the "Value data" text box, type in whatever you would like the title bar to read, select OK when done. I have mine named "5 Star Support Explorer".
If you have done this correctly, the next time you open up Internet Explorer, you should see your new name at the title bar.
Note: Be sure to back up your registry prior to making any changes.
Installing Fonts
Windows comes with a great deal of different fonts selections, but there are those of you that need more. Windows makes it easy to add new fonts to your system.
Once you have downloaded your font of choice:
Go to Start>> Control Panel.
Double-click the Fonts icon. If the Fonts icon is not visible, you may need to click Appearance and Themes first. Then go to "See Also" in the upper left of your screen.
Once you get to your Fonts window, you can either drag and drop your new font from its downloaded location into the Font window or, you can click on the File menu in the upper left of the Fonts window and select "Install New Font...". From here, you can browse to the new font location, click the font file and click OK. The font will automatically be copied into your Fonts folder.
Your new font will now be available for all Windows applications to use.
Launch the On-Screen Keyboard
Microsoft's on-screen keyboard utility is a virtual keyboard that allows people with mobility impairments to use the on-screen keyboard via a mouse or joystick.
To access the on-screen keyboard:
Go to Start>> Run. Type in: OSK [Enter] or click OK.
The on-screen keyboard will now be displayed at the bottom of your screen. You can move it anywhere you would like just as you can with any other window.
Once you have the on-screen keyboard displayed, you can click the "Keyboard" button and select the type of keyboard to be displayed (see figure #1).
Then, click the "Settings" button to select the mode you would like it to operate in
Quickly Close All Windows
If you have several windows open and you would like to close them quickly, you can hold down the CTRL button while clicking each taskbar button. With all of the buttons selected, right click the last button clicked and select "Close Group" (see illustration below).
Change Your Pointer Scheme
The default scheme for the Windows busy pointer is the hourglass. If you would like to change the default scheme to any of the available alternatives, such as:
Dinosaur
Ocean
Sports
...plus many more
Here's how:
Go to Start>> Control Panel>> Mouse>> Pointers tab
Next to Schemes, click the drop-down arrow and select a scheme to preview its pointers.
Click OK to apply the scheme of choice to your desktop.
Create a Shortcut to Lock Your System
In the event you should need to leave your computer system in a hurry and do not want others to be able to access your information. You can create a shortcut to sit on your desktop so that all you would have to do is double click this shortcut and your computer will automatically lock your display. This will not log-off your system. In order to unlock your computer, simply click your "User Name", enter your password and your back in business. Here's how to set this up:
Right click an empty area of your Desktop.
Select New>> Shortcut.
The Shortcut wizard will activate. Type the following exactly as is in to the "Type the location of the item:" text box:
rundll32.exe user32.dll,LockWorkStation
Note: It may be best to copy and paste the command (above) for accuracy sake.
Click Next
Enter a name for your new shortcut (eg: Lock System).
Click Finish
Alternately, you can always just press the Windows key + "L" on your keyboard which will do the very same thing. Some people just like having the shortcut to click.
Now that you have the Shortcut residing on your Desktop. You can change the actual icon to something other than the default icon. Here's how:
Right click the new shortcut on your Desktop.
Select Properties.
Select the Shortcut tab
Click the Change Icon button.
In the textbox titled: "Look for icons in this file", type in: shell32.dll
Click OK
Click any of the available icons from the list.
Click OK
Classic Start Menu
If you prefer to have your system Icons on the Desktop rather than having many of them in your Start Menu, then here's how to get the Classic Start Menu on your XP system.
Right-click the Start Menu and choose Properties. The "Taskbar and Start Menu Properties" window should appear.
In the bottom half of the window, select "Classic Start Menu" and then click OK or Apply, and you should see the old familiar Start Menu.
Full Screen feature
The Windows Full Screen Feature is very helpful when you are in search of a file within a very large folder. For instance, when you open your My Documents folder, press the F11 key on your keyboard to activate the Full Screen Feature. This will make the whole folder viewable within the screen instead of having to scroll down in search of your file. To revert back to your regular screen, just press the F11 key again.
all-windows-xp-tricks part2
Upgrade Paths
Both Home and Professional can be upgraded from Windows 98, Windows 98SE, and Windows ME. Windows NT 4.0, Windows 2000 and Windows XP Home can all be upgraded to Windows XP Professional. Windows 95 is not a supported upgrade path from either version.
Secure Attention Sequence Title
To change the title of the Secure Attention Sequence (SAS = Ctrl+Alt+Delete), perform the following steps:
Start the registry editor (regedit.exe).
Navigate to HKEY_LOCAL_MACHINE\SOFTWARE\Microsoft\WindowsNT\Cu rrentVersion\Winlogon.
From the Edit menu, select New> String value.
Enter a name of Welcome, and press Enter.
Double-click the new value, add the text you want to display after Windows Security (e.g., for 5 Star Support), and click OK.
Close the registry editor.
Press the SAS sequence to see the new dialog box title.
Configure Auto Updates
Microsoft regularly releases security patches, programs, language packs, and bug fixes through its Windows Update site to keep your system in tiptop shape. On today's "Call for Help," we'll show you how to configure XP to automatically download Windows updates for you.
Here's how to configure Windows XP to automatically download updates:
Single-click the Start Menu and then the Control Panel.
Single-click the Performance and Maintenance icon and then the System icon.
On the System properties dialog, click the Automatic Updates tab.
Click the radio button next to the text labeled "Download the updates automatically and notify me when they are ready to be installed."
Click the Apply button.
The next time you're online and there happens to be an available update, you'll be prompted to install it.
System Information
When you view the System Information, you will find much useful information such as, the length of time that XP has ran since rebooting. To find this information and more follow the instructions below:
Open the Command Prompt
Type in : systeminfo press [Enter] on your keyboard
Cancel A Print Job
I know that most of you at one time or another have, in an effort to stop a print task resorted to pulling the paper out of the printer until the printer showed the "out of paper" error message. Well, you don't have to do that. This tip will show you alternate methods of canceling a print job.
Usually the easiest way to stop a print job is to double-click its icon in the system tray to open the "printer queue folder". Then click on the print job that you would like to cancel and press the delete key on your keyboard.
Or, you can right click the print job and select "Cancel" from the resulting menu.
If neither of the above will work for you. Try turning the printer off and restarting it. You should be prompted to resume your print job. You can then select "Cancel" from that menu.
Saving Space
All Windows Operating Systems have a folder on the hard drive where various applications temporary files are stored. On occasion, it is a good idea to relieve your hard drive of these unneeded files. There are a couple different ways you can find these files:
1. Open Windows Explorer and in the Address field type: %temp% (including the percent signs) [Enter]. You will then be taken to that folder.
2. Click Start>> Run, and type: %temp% [Enter] Any of these temporary files that are found using the above methods are safe to delete.
Note: Sometimes the files are still in use, so deleting them works best immediately following a reboot.
Monitor USB Bandwidth Usage
USB devices such as; digital cameras, mice, flash drives and keyboards all share the same bandwidth allocated by Windows. The Windows XP USB user interface does not support more than 10 host controllers. When the bandwidth reaches the 100% allocation, you will receive a "Stop Error 0x0000007E" message.
To check the bandwidth usage:
Go to Start>> Right click on My Computer.
Select Properties>> Hardware>> Device Manager
Once at the Device Manager, double click "Universal Serial Bus Controllers", then double click the first USB Root Hub listing (see Figure #1).
In the resulting window, select Advanced (see Figure #2).
Playing a DVD Movie using WinDVD
To play a movie, follow the instructions below:
Open the DVD drive door, place a DVD into the tray, shiny side down, and close the DVD drive door.
If a window pops up asking which application you would like to use, choose WinDVD and then select OK. If any other windows appear other than WinDVD, just close the window.
WinDVD should start automatically. If it does not, you can start it from the All Programs menu. Here's how:
In Windows 98 and Me: Go to Start>> Programs>> Accessories>> Entertainment>> DVD Player
In Windows XP: Go to Start>> All Programs>> Intervideo WinDVD
The WinDVD console and viewing window will now appear. The DVD should automatically start playing at this point, but in the event that it does not, try the following:
Click the Play control, a dark triangle that points to the right (see Figure #1).
If the DVD movie still does not play, click the small down pointing arrow directly under the WinDVD logo on the console to view the console menu options. You will also see a 'Help' option if further troubleshooting is required
Windows Keyboard Shortcuts
The keyboard shortcuts listed below are used as an alternate method of working with Windows XP. Many people find it faster and more convenient to use the keyboard when performing some tasks. You will need to experiment with them to find what works best and feels more comfortable to you.
Command Result
CTRL + C Copy
CTRL + X Cut
CTRL + V Paste
CTRL + Z Undo
DELETE Delete
SHIFT + DELETE Delete selected item permanently without placing the item in the Recycle Bin
CTRL while dragging an item Copy selected item
CTRL + SHIFT while dragging an item Create shortcut to selected item
F2 Rename selected item
CTRL + RIGHT ARROW Move the insertion point to the beginning of the next word
CTRL + LEFT ARROW Move the insertion point to the beginning of the previous word
CTRL + DOWN ARROW Move the insertion point to the beginning of the next paragraph
CTRL + UP ARROW Move the insertion point to the beginning of the previous paragraph.
CTRL + SHIFT with any of the arrow keys Highlight a block of text
SHIFT with any of the arrow keys Select more than one item in a window or on the desktop, or select text within a document
CTRL + A Select all
F3 Search for a file or folder
ALT + ENTER View properties for the selected item
ALT + F4 Close the active item, or quit the active program
ALT + Enter Displays the properties of the selected object
ALT + SPACEBAR Opens the shortcut menu for the active window
CTRL + F4 Close the active document in programs that allow you to have multiple documents open simultaneously
ALT + TAB Switch between open items
ALT + ESC Cycle through items in the order they were opened
F6 Cycle through screen elements in a window or on the desktop
F4 Display the Address bar list in My Computer or Windows Explorer
SHIFT + F10 Display the shortcut menu for the selected item
ALT + SPACEBAR Display the System menu for the active window
CTRL + ESC Display the Start menu
ALT + Underlined letter in a menu name Display the corresponding menu
Underlined letter in a command name on an open menu Carry out the corresponding command
F10 Activate the menu bar in the active program
RIGHT ARROW Open the next menu to the right, or open a submenu
LEFT ARROW Open the next menu to the left, or close a submenu
F5 Refresh the active window
BACKSPACE View the folder one level up in My Computer or Windows Explorer
ESC Cancel the current task
SHIFT when you insert a CD into the CD-ROM drive Prevent the CD from automatically playing.
Make a backup copy of your Windows XP Registry
Many of the tips and tricks here at 5 Star Support require editing the Windows Registry. In this tip, I will show you the correct way to perform a backup of your Windows Registry so that you can safely restore your systems registry files in the event something goes wrong.
Go to Start>> Run. Type in: regedit [Enter] or click OK.
Once in the Registry Editor, choose File from the toolbar.
Select Export
In the resulting Export Registry File window (click image below), locate the "Save in:" selection menu. Choose a location for this file that will be easily found if needed.
Name the file whatever you would like (I use the days date) in the "File name:" text box.
At the bottom of the window you will see the Export Range category. Tick the "All" selection.
Click the Save button.
Uninstall Windows Updates
Method #1
Windows Update is a very important tool that serves to protect or improve upon your computers functionality. In some cases, you may encounter problems due to an update that did not install correctly. If this happens, here is how you can uninstall the update package:
Go to Start>> Control Panel>> Add or Remove Programs
Select the Change or Remove Programs button
Locate the offending update, click it to highlight it, then click the Change/Remove button
If it is an updated device drive that is causing the problem, here's how you can uninstall the updated driver and go back to the previous one.
Go to Start>> Control Panel>> System
Click the Hardware tab
Select Device Manager
Double click the offending device
Click the Driver tab
Select Roll Back Driver
Method #2
Using System Restore, you can quickly and easily take your system back to a restore point before installing the update. Here's how:
Go to Start>> All Programs>> Accessories>> System Tools>> System Restore
Tick the task that states "Restore my computer to an earlier time"
Click Next, then follow the onscreen instructions
Microsoft Narrator
Microsoft narrator is an accessibility option to assist the hearing impaired. To activate this feature:
Select Start, Programs >> Accessories >>Accessibility >>Narrator. (Or press the Windows key plus the letter "U" to open the Utility Manager.)
Once you've read through the intro screen (or let the Narrator do it), click OK.
You'll now see a dialog box of Narrator options.
Assuming you want to leave Narrator running, select the desired options, then minimize its dialog box. And if you've opened the Utility Manager, feel free to close it.
To turn Narrator off, click the Exit button or right-click its taskbar item and select Close.
Install the NetBEUI Protocol
This tip describes how to install the NetBEUI protocol on a Windows XP-based computer. This may be useful because the NetBEUI protocol is not included in the list of installable protocols in Windows XP even though the files that are needed to install the protocol are included with the installation CD-ROM. It is important to note that the NetBEUI protocol is not supported on Windows XP.
The Netnbf.inf and Nbf.sys files are the files that are needed to install the NetBEUI protocol. To install the NetBEUI protocol:
Click Start, click Control Panel, and then double-click Network Connections.
Right-click the adapter you want to add NetBEUI to, and then click Properties.
On the General tab, click Install.
Click Protocol, and then click Add.
Click Have Disk, insert your Windows XP CD-ROM, open the Valueadd\msft\net\netbeui folder, click the Netnbf.inf file, and then click Open.
Click OK, and then click OK to complete the installation.
Reinstall the Windows games
Follow the instructions for your version of Windows. Unless you have the Windows installation files on your hard drive, you will need your Windows installation CD.
To reinstall Windows games in Windows XP and 2000
On the Windows taskbar, click Start > Settings > Control Panel > Add or Remove Programs.
Click Add or Remove Windows Components.
Select Accessories and Utilities, and then click Details.
Select Games, and then click Details.
Uncheck all games.
Click OK on any open window.
Click Next on the Windows Component Wizard window.
When the process finishes, click Finish.
Repeat steps 1-8, this time rechecking the Games check box.
To reinstall Windows games in Windows 98, 95, and Me
On the Windows taskbar, click Start > Settings > Control Panel > Add/Remove Programs.
On the Windows Setup tab, double-click Accessories.
Uncheck Games.
Click Apply, and then OK to close any open windows.
When the process finishes, repeat steps 1-4, but this time recheck the Games check box.
Print only selected text from web sites
If you have found a great recipe online but you don't want to print out the whole web page, here is how you can print only the text you select.
Highlight the text that you would like to print by left clicking once and while holding the click down, drag your mouse over the chosen text (see figure #1).
Once the text is highlighted, right click the highlighted area and select Print.
In the resulting Print window, tick the "Selection" entry under the Page Range option
Click Print.
Email a picture of your screen
If you ever need to copy something that appears on your screen, such as an error message or a section of a document to be emailed to another party, Windows makes this an easy task. Here's how:
Once you have the item that you would like to copy on your screen, press the Print Screen (prt scr) key on your keyboard. This key is right next to your F12 key on a standard keyboard. You have now captured the image and it is ready to be pasted into a picture editor. In this tip we will use Paint to edit this image. Here's how:
Go to Start>> All Programs>> Accessories>> Paint.
Go to Edit>> Paste. This will paste your captured image into the picture palette area.
Using the rectangular shaped (Select) tool from the left menu, you can select a rectangular area around the particular message that you would like to copy (see Figure #1).
With the area selected, go to Edit>> Copy.
Next, go to File>> New. Choose not to save the changes to the old palette. A new palette will now be created.
Now, go to Edit>> Paste. The selected area of your first palette is now in the new palette (see Figure #2).
Go to File>> Save as... Name the file whatever you would like and save it to a location that can be easily found later (such as your desktop).
Create a new email message and save this new image as either a picture to be inserted into the body of your email or as an attachment to your email.
Microsoft Photo Story 3 for Windows XP
Microsoft has made available for free, a program that will bring your digital photo's to life! With this powerful program you can:
Create slideshows
Touch-up, crop, or rotate pictures
Add stunning special effects and soundtracks
Narrate your photo stories
Personalize them with titles and captions
Send your photo stories in an e-mail
Watch them on your TV, a computer, or a Windows Mobile-based portable device
System Requirements:
Supported Operating Systems: Windows XP; Windows XP Home Edition; Windows XP Media Center Edition; Windows XP Professional Edition; Windows XP Service Pack 1; Windows XP Service Pack 2
Processor Required: Intel P3 700-megahertz (MHz)
or equivalent processor, an Intel P4 1.7-gigahertz (GHz) or equivalent
processor recommended.
Memory: 256 megabytes (MB) of RAM, 512 MB of RAM
or more recommended.
Disk space: 400 MB of available hard disk space.
Monitor: Super VGA (800 x 600) or
higher-resolution video adapter and monitor.
Windows Genuine Advantage.
Microsoft Windows Media Player 10.
Microsoft DirectX 9.0 or later.
Windows XP-compatible sound card and speakers.
Keyboard and Microsoft Mouse or compatible pointing
device.
Microphone to record narration.
Learn more about Photo Story 3 and download it here:
CODE: SELECT ALL
Obtain Version Information
Using the Windows Registry, you can quickly and easily find your Windows version, build and service pack information for Windows NT, 2000, XP.
Go to Start>> Run, type in: regedit [Enter]
Drill to: HKEY_LOCAL_MACHINE\Software\Microsoft\Windows NT\CurrentVersion
The following values tell the following information:
Value Information
CSDVersion Service Pack
CurrentBuildNumber Build Number
CurrentVersion Version Number
ProductName Windows Version Name
How to login as Administrator
[ XP Pro]
XP's built-in Administrator account is hidden from the welcome screen when a user account with admin privileges exists and is enabled. XP Home Edition allows you to login as built-in administrator in safe mode only. In XP Professional, just press CTRL+ALT+DEL twice at the Welcome Screen then type in your admin password into the resulting classic logon window that appears. Below, you will find two methods to have the admin account display in the welcome screen.
[1] TweakUI:
You can download Tweakui for free here:
CODE: SELECT ALL
1. Once you open Tweakui.
2. In the left pane, click the Logon option.
3. Then place a checkmark in the Show Administrator option.
4. Click OK
Once you logoff, the welcome screen should now list Administrator login.
[2] Edit Windows Registry:
Warning: Be sure to make a backup copy of the registry prior to making any changes.
Go to Start>> Run>> Type in: regedit [Enter]
Drill down to the following registry key:
HKEY_LOCAL_MACHINE/SOFTWARE/Microsoft/Windows NT/CurrentVersion/Winlogon/SpecialAccounts/UserList
Right-click an empty space in the right pane and select New DWORD Value. Type in the word Administrator as the value. Double-click this new value, and enter 1 as the data. Close the registry editor.
Download PowerToys for Windows XP
I just ran across this link and wanted to share it. There are many useful utilities listed in the link below. But the most useful is TweakUI which in my opinion is a "must-have"!
CODE: SELECT ALL
Clear AutoComplete Entries from Web Forms
I'm sure that all of you have noticed that when you are filling out a web form, once you press a letter, many different text choices are available in the AutoComplete menu. To remove any of these items, just simply highlight the item and press delete on your keyboard. To completely clear all AutoComplete entries, follow the steps below:
Open Internet Explorer
Go to Tools>> Internet Options>> Content tab
Under the Personal Information category, press the AutoComplete button.
Press Clear Forms from the resulting menu.
How to tell if SP2 is installed
Here is a very easy method to show if you have SP2 installed:
1. Go to Start
2. Right click on My Computer
3. You will now see a similar image to that of my illustration below
Find out what programs are installed
To find out what Microsoft products are installed on your computer, follow the instructions below:
Go to Start>> Help and Support
In the left column of the Help and Support window and under "Pick a Help Topic", select "Windows basics".
In the left pane, click the plus (+) symbol to expand "Core Windows tasks".
Click "Searching for information".
In the right pane, under "Pick a task:", click "Get information about your computer".
In the right pane, under "What do you want to do?", click "View a list of Microsoft software installed on this computer".
Once you have the information in view, you can Print this information by clicking the Print button located in the toolbar above the list of information.
Questions you should ask yourself when buying a new computer
Is it the latest technology?
Make sure that you are getting the latest technology. With computers changing so rapidly, you could run the risk of having an outdated system in a very short period of time. It also may not be a bad idea to make sure that your new system is upgradeable.
Does it have everything I need?
Do you need a new monitor with it? Does it come with the software that you need? Do you need a new printer? Will the printer that your system comes with fit your needs? If you are buying a package deal, make sure that what you are getting is going to be good enough for you. At the same time, make sure you are not getting things that you will never use.
What technical support is included?
Almost all computers are essentially made from the same parts. It is the technical support that can often set one company apart from the others. There is great peace of mind in knowing that if a problem should arise, you have competent tech support at your service! Make sure that they have a toll free number and check to see what their hours of operation are. Be sure to check on the actual coverage. Many times the computer stores extended service coverage will only start when the manufactures warranty has expired.
Be sure to ask plenty of questions when purchasing a new computer. Feel free to shop around. The Internet has made shopping for computers very easy and most manufactures web sites have excellent descriptions and visual references to their systems and system components. If you do a little homework before you buy your new computer, you will help ensure that your system will work well for you.
Capture a Windows Screen
If for whatever reason you would like to capture what is on your computer screen, Windows makes this task easy. here's how:
Press the Printscreen (prt scr) key. This will place a digital image of your screen on to the clipboard.
Open any image editing software such as:
Paint
Word
PowerPoint
Select Edit and Paste
The image will now be available to edit. From here you can print it, save it to a file or post it to the Web like the screen capture below.
Limit Computer's Function
I would like to create a separate user account on Windows XP that would be given VERY LIMITED functions, similar to those system you might see in a library. It must not have any access to hard drives nor access any programs. I would like to be able to control Internet access at the Administration level if possible. How would I go about doing this?
It looks like you are looking for something like the Computer Toolkit for Windows. Computer Toolkit for Windows was designed to help administrators better manage and secure public computers, such as those in kiosks, libraries, Internet cafes, schools, etc. But the toolkit is useful for any situation in which multiple persons use the same computer, including family computing and small business offices where several employees must use the same machine. [More]
Also see: Microsoft Shared Computer Toolkit
Easily re-activate your XP installation
In the event you need to reinstall your XP installation, you won't have to re-activate it. All you have to do is copy the wpa.dbl file located at WINDOWS\system32 folder prior to the reinstallation. Once the reinstallation is complete, replace the copied file with the newly created one.
Protect your data during a power outage
I'm sure that many of you have been victims of data loss due to a power outage. In some cases, devastated by this event. Most people that need certain safe guards from power outages use a Uninterruptible Power Supply (UPS). It used to be that a UPS would only be used at places such as data centers or critical business applications. Since the cost of a UPS has come down considerably over the years, this is now a cost effective solution for personal computers too.
A UPS is nothing more than a battery backup. So, knowing that the UPS is giving you 'battery' power during a power outage, you know that you are not going to be able to continue working on your computer, but you will have enough time to save the work that you've already started. That is its sole purpose.
If you have unsaved data and are away from your computer during a power outage, you can configure your 'Power Option' settings to ensure that your computer will go in to Hibernate mode before the battery backup power is gone. Once a computer enters Hibernate mode, it takes all of the data that is in memory and stores it on your hard drive. Here is how to configure this setting:
Go to Start>> Control Panel>> Performance and Maintenance>> Power Options.
In Power Option Properties, select the Hibernate tab.
Place a checkmark in the checkbox titled: Enable hibernation. Click Apply
Click the Power Schemes tab.
In the Power Schemes drop down menu, select Max Battery from the list.
In the "System hibernates" category, select a time that is less than your maximum backup battery life. Click Apply
Exit all windows.
Store all of your passwords on one secure database
If you have a long list of user names and passwords used for a variety of different frequently accessed programs, then it will interest you to know that there is a free utility that uses a high level encryption to keep these sensitive items safely stored in its database. This free utility is called "KeePass". It is an open-source password manager designed to store all of your passwords and user names in a safe and secure way, and all on one database.
Instructions for use:
Download and Run the KeePass program.
From the 'File' menu select "New Database".
Enter a Master Password or select a "Key Disk".
You can now store your passwords in Groups. As an example; Store all of your banking, asset management or home business passwords in a group named "Financial". Store all of your game site passwords in another group named "Games".
Populate each group by selecting each group in the right pane and right click the group entry. Select "Add Entry" from the resulting menu.
Note: To get familiar with this powerful utility, you can browse their help files. Click on the "?" for help.
BIOS Settings
As your system boots, Windows has created a method to gain access to the BIOS settings. Most commonly, this entails pressing the DELETE key on your keyboard repeatedly as the system boots. If you have created a BIOS password, you will be prompted as some point to enter it. If you have forgotten your BIOS password, we have a web page that can help:
BIOS Generic Passwords
Once you've gained entrance to the BIOS settings you will see many self explanatory settings. The settings you see will depend on the manufacturer of your motherboard.
Windows Utilities Shortcuts
Here are some popular shortcuts to handy Windows utilities:
Simply type the shortcut command in to the Run textbox (Start>> Run), then click OK.
Shortcut
Utility
compmgmt.msc Computer Management
devmgmt.msc Device Manager
dfrg.msc Disk Defragmenter
diskmgmt.msc Disk Management
eventvwr.msc Event Viewer
fsmgmt.msc Shared Folders Manager
gpedit.msc Group Policies Editor
lusrmgr.msc Local Users and Groups Manager
perfmon.msc Performance Monitor
secpol.msc Local Security Settings
services.msc Services
Create a Password Reset Disk
Creating a password reset disk is a great backup idea for when/if you should ever forget your login password. You will need to be running XP Professional as a local user in a workgroup environment. Here's how to create the disk:
Go to Start>> Control Panel>> User Accounts
Select your account name.
Under the Related Tasks category, select "Prevent a forgotten password".
The Forgotten Password Wizard will now be invoked. Follow the onscreen instructions to successfully create your Password Reset Disk.
Important: Be sure to store this disk in a safe place. Anyone having access to it can easily access your information.
Using the Windows Key
The Windows logo key, located in the bottom row of most computer keyboards is a little-used treasure. Don't ignore it. It is the shortcut anchor for the following commands:
Windows: Display the Start menu
Windows + D: Minimize or restore all windows
Windows + E: Display Windows Explorer
Windows + F: Display Search for files
Windows + L: Lock the workstation
Windows + M: Minimize all windows
Windows + Q: Quick switching of users (Powertoys only)
Windows + Q: Hold Windows Key, then tap Q to scroll thru the different users on your pc
Windows + R: Display Run dialog box
Windows + U: Open Utility Manager
Windows + Ctrl + F: Display Search for computer
Windows + F1: Display Help and Support Center
Windows + Pause/ Break: Display System Properties dialog box
Windows + Shift + M: Undo minimize all windows
Windows + Tab: Cycles through all open programs and taskbar buttons. Press [ENTER] to select.
Both Home and Professional can be upgraded from Windows 98, Windows 98SE, and Windows ME. Windows NT 4.0, Windows 2000 and Windows XP Home can all be upgraded to Windows XP Professional. Windows 95 is not a supported upgrade path from either version.
Secure Attention Sequence Title
To change the title of the Secure Attention Sequence (SAS = Ctrl+Alt+Delete), perform the following steps:
Start the registry editor (regedit.exe).
Navigate to HKEY_LOCAL_MACHINE\SOFTWARE\Microsoft\WindowsNT\Cu rrentVersion\Winlogon.
From the Edit menu, select New> String value.
Enter a name of Welcome, and press Enter.
Double-click the new value, add the text you want to display after Windows Security (e.g., for 5 Star Support), and click OK.
Close the registry editor.
Press the SAS sequence to see the new dialog box title.
Configure Auto Updates
Microsoft regularly releases security patches, programs, language packs, and bug fixes through its Windows Update site to keep your system in tiptop shape. On today's "Call for Help," we'll show you how to configure XP to automatically download Windows updates for you.
Here's how to configure Windows XP to automatically download updates:
Single-click the Start Menu and then the Control Panel.
Single-click the Performance and Maintenance icon and then the System icon.
On the System properties dialog, click the Automatic Updates tab.
Click the radio button next to the text labeled "Download the updates automatically and notify me when they are ready to be installed."
Click the Apply button.
The next time you're online and there happens to be an available update, you'll be prompted to install it.
System Information
When you view the System Information, you will find much useful information such as, the length of time that XP has ran since rebooting. To find this information and more follow the instructions below:
Open the Command Prompt
Type in : systeminfo press [Enter] on your keyboard
Cancel A Print Job
I know that most of you at one time or another have, in an effort to stop a print task resorted to pulling the paper out of the printer until the printer showed the "out of paper" error message. Well, you don't have to do that. This tip will show you alternate methods of canceling a print job.
Usually the easiest way to stop a print job is to double-click its icon in the system tray to open the "printer queue folder". Then click on the print job that you would like to cancel and press the delete key on your keyboard.
Or, you can right click the print job and select "Cancel" from the resulting menu.
If neither of the above will work for you. Try turning the printer off and restarting it. You should be prompted to resume your print job. You can then select "Cancel" from that menu.
Saving Space
All Windows Operating Systems have a folder on the hard drive where various applications temporary files are stored. On occasion, it is a good idea to relieve your hard drive of these unneeded files. There are a couple different ways you can find these files:
1. Open Windows Explorer and in the Address field type: %temp% (including the percent signs) [Enter]. You will then be taken to that folder.
2. Click Start>> Run, and type: %temp% [Enter] Any of these temporary files that are found using the above methods are safe to delete.
Note: Sometimes the files are still in use, so deleting them works best immediately following a reboot.
Monitor USB Bandwidth Usage
USB devices such as; digital cameras, mice, flash drives and keyboards all share the same bandwidth allocated by Windows. The Windows XP USB user interface does not support more than 10 host controllers. When the bandwidth reaches the 100% allocation, you will receive a "Stop Error 0x0000007E" message.
To check the bandwidth usage:
Go to Start>> Right click on My Computer.
Select Properties>> Hardware>> Device Manager
Once at the Device Manager, double click "Universal Serial Bus Controllers", then double click the first USB Root Hub listing (see Figure #1).
In the resulting window, select Advanced (see Figure #2).
Playing a DVD Movie using WinDVD
To play a movie, follow the instructions below:
Open the DVD drive door, place a DVD into the tray, shiny side down, and close the DVD drive door.
If a window pops up asking which application you would like to use, choose WinDVD and then select OK. If any other windows appear other than WinDVD, just close the window.
WinDVD should start automatically. If it does not, you can start it from the All Programs menu. Here's how:
In Windows 98 and Me: Go to Start>> Programs>> Accessories>> Entertainment>> DVD Player
In Windows XP: Go to Start>> All Programs>> Intervideo WinDVD
The WinDVD console and viewing window will now appear. The DVD should automatically start playing at this point, but in the event that it does not, try the following:
Click the Play control, a dark triangle that points to the right (see Figure #1).
If the DVD movie still does not play, click the small down pointing arrow directly under the WinDVD logo on the console to view the console menu options. You will also see a 'Help' option if further troubleshooting is required
Windows Keyboard Shortcuts
The keyboard shortcuts listed below are used as an alternate method of working with Windows XP. Many people find it faster and more convenient to use the keyboard when performing some tasks. You will need to experiment with them to find what works best and feels more comfortable to you.
Command Result
CTRL + C Copy
CTRL + X Cut
CTRL + V Paste
CTRL + Z Undo
DELETE Delete
SHIFT + DELETE Delete selected item permanently without placing the item in the Recycle Bin
CTRL while dragging an item Copy selected item
CTRL + SHIFT while dragging an item Create shortcut to selected item
F2 Rename selected item
CTRL + RIGHT ARROW Move the insertion point to the beginning of the next word
CTRL + LEFT ARROW Move the insertion point to the beginning of the previous word
CTRL + DOWN ARROW Move the insertion point to the beginning of the next paragraph
CTRL + UP ARROW Move the insertion point to the beginning of the previous paragraph.
CTRL + SHIFT with any of the arrow keys Highlight a block of text
SHIFT with any of the arrow keys Select more than one item in a window or on the desktop, or select text within a document
CTRL + A Select all
F3 Search for a file or folder
ALT + ENTER View properties for the selected item
ALT + F4 Close the active item, or quit the active program
ALT + Enter Displays the properties of the selected object
ALT + SPACEBAR Opens the shortcut menu for the active window
CTRL + F4 Close the active document in programs that allow you to have multiple documents open simultaneously
ALT + TAB Switch between open items
ALT + ESC Cycle through items in the order they were opened
F6 Cycle through screen elements in a window or on the desktop
F4 Display the Address bar list in My Computer or Windows Explorer
SHIFT + F10 Display the shortcut menu for the selected item
ALT + SPACEBAR Display the System menu for the active window
CTRL + ESC Display the Start menu
ALT + Underlined letter in a menu name Display the corresponding menu
Underlined letter in a command name on an open menu Carry out the corresponding command
F10 Activate the menu bar in the active program
RIGHT ARROW Open the next menu to the right, or open a submenu
LEFT ARROW Open the next menu to the left, or close a submenu
F5 Refresh the active window
BACKSPACE View the folder one level up in My Computer or Windows Explorer
ESC Cancel the current task
SHIFT when you insert a CD into the CD-ROM drive Prevent the CD from automatically playing.
Make a backup copy of your Windows XP Registry
Many of the tips and tricks here at 5 Star Support require editing the Windows Registry. In this tip, I will show you the correct way to perform a backup of your Windows Registry so that you can safely restore your systems registry files in the event something goes wrong.
Go to Start>> Run. Type in: regedit [Enter] or click OK.
Once in the Registry Editor, choose File from the toolbar.
Select Export
In the resulting Export Registry File window (click image below), locate the "Save in:" selection menu. Choose a location for this file that will be easily found if needed.
Name the file whatever you would like (I use the days date) in the "File name:" text box.
At the bottom of the window you will see the Export Range category. Tick the "All" selection.
Click the Save button.
Uninstall Windows Updates
Method #1
Windows Update is a very important tool that serves to protect or improve upon your computers functionality. In some cases, you may encounter problems due to an update that did not install correctly. If this happens, here is how you can uninstall the update package:
Go to Start>> Control Panel>> Add or Remove Programs
Select the Change or Remove Programs button
Locate the offending update, click it to highlight it, then click the Change/Remove button
If it is an updated device drive that is causing the problem, here's how you can uninstall the updated driver and go back to the previous one.
Go to Start>> Control Panel>> System
Click the Hardware tab
Select Device Manager
Double click the offending device
Click the Driver tab
Select Roll Back Driver
Method #2
Using System Restore, you can quickly and easily take your system back to a restore point before installing the update. Here's how:
Go to Start>> All Programs>> Accessories>> System Tools>> System Restore
Tick the task that states "Restore my computer to an earlier time"
Click Next, then follow the onscreen instructions
Microsoft Narrator
Microsoft narrator is an accessibility option to assist the hearing impaired. To activate this feature:
Select Start, Programs >> Accessories >>Accessibility >>Narrator. (Or press the Windows key plus the letter "U" to open the Utility Manager.)
Once you've read through the intro screen (or let the Narrator do it), click OK.
You'll now see a dialog box of Narrator options.
Assuming you want to leave Narrator running, select the desired options, then minimize its dialog box. And if you've opened the Utility Manager, feel free to close it.
To turn Narrator off, click the Exit button or right-click its taskbar item and select Close.
Install the NetBEUI Protocol
This tip describes how to install the NetBEUI protocol on a Windows XP-based computer. This may be useful because the NetBEUI protocol is not included in the list of installable protocols in Windows XP even though the files that are needed to install the protocol are included with the installation CD-ROM. It is important to note that the NetBEUI protocol is not supported on Windows XP.
The Netnbf.inf and Nbf.sys files are the files that are needed to install the NetBEUI protocol. To install the NetBEUI protocol:
Click Start, click Control Panel, and then double-click Network Connections.
Right-click the adapter you want to add NetBEUI to, and then click Properties.
On the General tab, click Install.
Click Protocol, and then click Add.
Click Have Disk, insert your Windows XP CD-ROM, open the Valueadd\msft\net\netbeui folder, click the Netnbf.inf file, and then click Open.
Click OK, and then click OK to complete the installation.
Reinstall the Windows games
Follow the instructions for your version of Windows. Unless you have the Windows installation files on your hard drive, you will need your Windows installation CD.
To reinstall Windows games in Windows XP and 2000
On the Windows taskbar, click Start > Settings > Control Panel > Add or Remove Programs.
Click Add or Remove Windows Components.
Select Accessories and Utilities, and then click Details.
Select Games, and then click Details.
Uncheck all games.
Click OK on any open window.
Click Next on the Windows Component Wizard window.
When the process finishes, click Finish.
Repeat steps 1-8, this time rechecking the Games check box.
To reinstall Windows games in Windows 98, 95, and Me
On the Windows taskbar, click Start > Settings > Control Panel > Add/Remove Programs.
On the Windows Setup tab, double-click Accessories.
Uncheck Games.
Click Apply, and then OK to close any open windows.
When the process finishes, repeat steps 1-4, but this time recheck the Games check box.
Print only selected text from web sites
If you have found a great recipe online but you don't want to print out the whole web page, here is how you can print only the text you select.
Highlight the text that you would like to print by left clicking once and while holding the click down, drag your mouse over the chosen text (see figure #1).
Once the text is highlighted, right click the highlighted area and select Print.
In the resulting Print window, tick the "Selection" entry under the Page Range option
Click Print.
Email a picture of your screen
If you ever need to copy something that appears on your screen, such as an error message or a section of a document to be emailed to another party, Windows makes this an easy task. Here's how:
Once you have the item that you would like to copy on your screen, press the Print Screen (prt scr) key on your keyboard. This key is right next to your F12 key on a standard keyboard. You have now captured the image and it is ready to be pasted into a picture editor. In this tip we will use Paint to edit this image. Here's how:
Go to Start>> All Programs>> Accessories>> Paint.
Go to Edit>> Paste. This will paste your captured image into the picture palette area.
Using the rectangular shaped (Select) tool from the left menu, you can select a rectangular area around the particular message that you would like to copy (see Figure #1).
With the area selected, go to Edit>> Copy.
Next, go to File>> New. Choose not to save the changes to the old palette. A new palette will now be created.
Now, go to Edit>> Paste. The selected area of your first palette is now in the new palette (see Figure #2).
Go to File>> Save as... Name the file whatever you would like and save it to a location that can be easily found later (such as your desktop).
Create a new email message and save this new image as either a picture to be inserted into the body of your email or as an attachment to your email.
Microsoft Photo Story 3 for Windows XP
Microsoft has made available for free, a program that will bring your digital photo's to life! With this powerful program you can:
Create slideshows
Touch-up, crop, or rotate pictures
Add stunning special effects and soundtracks
Narrate your photo stories
Personalize them with titles and captions
Send your photo stories in an e-mail
Watch them on your TV, a computer, or a Windows Mobile-based portable device
System Requirements:
Supported Operating Systems: Windows XP; Windows XP Home Edition; Windows XP Media Center Edition; Windows XP Professional Edition; Windows XP Service Pack 1; Windows XP Service Pack 2
Processor Required: Intel P3 700-megahertz (MHz)
or equivalent processor, an Intel P4 1.7-gigahertz (GHz) or equivalent
processor recommended.
Memory: 256 megabytes (MB) of RAM, 512 MB of RAM
or more recommended.
Disk space: 400 MB of available hard disk space.
Monitor: Super VGA (800 x 600) or
higher-resolution video adapter and monitor.
Windows Genuine Advantage.
Microsoft Windows Media Player 10.
Microsoft DirectX 9.0 or later.
Windows XP-compatible sound card and speakers.
Keyboard and Microsoft Mouse or compatible pointing
device.
Microphone to record narration.
Learn more about Photo Story 3 and download it here:
CODE: SELECT ALL
Code:
http://www.microsoft.com/windowsxp/using/digitalphotography/photostory/default.mspx
Obtain Version Information
Using the Windows Registry, you can quickly and easily find your Windows version, build and service pack information for Windows NT, 2000, XP.
Go to Start>> Run, type in: regedit [Enter]
Drill to: HKEY_LOCAL_MACHINE\Software\Microsoft\Windows NT\CurrentVersion
The following values tell the following information:
Value Information
CSDVersion Service Pack
CurrentBuildNumber Build Number
CurrentVersion Version Number
ProductName Windows Version Name
How to login as Administrator
[ XP Pro]
XP's built-in Administrator account is hidden from the welcome screen when a user account with admin privileges exists and is enabled. XP Home Edition allows you to login as built-in administrator in safe mode only. In XP Professional, just press CTRL+ALT+DEL twice at the Welcome Screen then type in your admin password into the resulting classic logon window that appears. Below, you will find two methods to have the admin account display in the welcome screen.
[1] TweakUI:
You can download Tweakui for free here:
CODE: SELECT ALL
Code:
http://www.5starsupport.com/info/xpinfo.htm#powertoys
1. Once you open Tweakui.
2. In the left pane, click the Logon option.
3. Then place a checkmark in the Show Administrator option.
4. Click OK
Once you logoff, the welcome screen should now list Administrator login.
[2] Edit Windows Registry:
Warning: Be sure to make a backup copy of the registry prior to making any changes.
Go to Start>> Run>> Type in: regedit [Enter]
Drill down to the following registry key:
HKEY_LOCAL_MACHINE/SOFTWARE/Microsoft/Windows NT/CurrentVersion/Winlogon/SpecialAccounts/UserList
Right-click an empty space in the right pane and select New DWORD Value. Type in the word Administrator as the value. Double-click this new value, and enter 1 as the data. Close the registry editor.
Download PowerToys for Windows XP
I just ran across this link and wanted to share it. There are many useful utilities listed in the link below. But the most useful is TweakUI which in my opinion is a "must-have"!
CODE: SELECT ALL
Code:
http://www.microsoft.com/windowsxp/downloads/powertoys/xppowertoys.mspx
Clear AutoComplete Entries from Web Forms
I'm sure that all of you have noticed that when you are filling out a web form, once you press a letter, many different text choices are available in the AutoComplete menu. To remove any of these items, just simply highlight the item and press delete on your keyboard. To completely clear all AutoComplete entries, follow the steps below:
Open Internet Explorer
Go to Tools>> Internet Options>> Content tab
Under the Personal Information category, press the AutoComplete button.
Press Clear Forms from the resulting menu.
How to tell if SP2 is installed
Here is a very easy method to show if you have SP2 installed:
1. Go to Start
2. Right click on My Computer
3. You will now see a similar image to that of my illustration below
Find out what programs are installed
To find out what Microsoft products are installed on your computer, follow the instructions below:
Go to Start>> Help and Support
In the left column of the Help and Support window and under "Pick a Help Topic", select "Windows basics".
In the left pane, click the plus (+) symbol to expand "Core Windows tasks".
Click "Searching for information".
In the right pane, under "Pick a task:", click "Get information about your computer".
In the right pane, under "What do you want to do?", click "View a list of Microsoft software installed on this computer".
Once you have the information in view, you can Print this information by clicking the Print button located in the toolbar above the list of information.
Questions you should ask yourself when buying a new computer
Is it the latest technology?
Make sure that you are getting the latest technology. With computers changing so rapidly, you could run the risk of having an outdated system in a very short period of time. It also may not be a bad idea to make sure that your new system is upgradeable.
Does it have everything I need?
Do you need a new monitor with it? Does it come with the software that you need? Do you need a new printer? Will the printer that your system comes with fit your needs? If you are buying a package deal, make sure that what you are getting is going to be good enough for you. At the same time, make sure you are not getting things that you will never use.
What technical support is included?
Almost all computers are essentially made from the same parts. It is the technical support that can often set one company apart from the others. There is great peace of mind in knowing that if a problem should arise, you have competent tech support at your service! Make sure that they have a toll free number and check to see what their hours of operation are. Be sure to check on the actual coverage. Many times the computer stores extended service coverage will only start when the manufactures warranty has expired.
Be sure to ask plenty of questions when purchasing a new computer. Feel free to shop around. The Internet has made shopping for computers very easy and most manufactures web sites have excellent descriptions and visual references to their systems and system components. If you do a little homework before you buy your new computer, you will help ensure that your system will work well for you.
Capture a Windows Screen
If for whatever reason you would like to capture what is on your computer screen, Windows makes this task easy. here's how:
Press the Printscreen (prt scr) key. This will place a digital image of your screen on to the clipboard.
Open any image editing software such as:
Paint
Word
PowerPoint
Select Edit and Paste
The image will now be available to edit. From here you can print it, save it to a file or post it to the Web like the screen capture below.
Limit Computer's Function
I would like to create a separate user account on Windows XP that would be given VERY LIMITED functions, similar to those system you might see in a library. It must not have any access to hard drives nor access any programs. I would like to be able to control Internet access at the Administration level if possible. How would I go about doing this?
It looks like you are looking for something like the Computer Toolkit for Windows. Computer Toolkit for Windows was designed to help administrators better manage and secure public computers, such as those in kiosks, libraries, Internet cafes, schools, etc. But the toolkit is useful for any situation in which multiple persons use the same computer, including family computing and small business offices where several employees must use the same machine. [More]
Also see: Microsoft Shared Computer Toolkit
Easily re-activate your XP installation
In the event you need to reinstall your XP installation, you won't have to re-activate it. All you have to do is copy the wpa.dbl file located at WINDOWS\system32 folder prior to the reinstallation. Once the reinstallation is complete, replace the copied file with the newly created one.
Protect your data during a power outage
I'm sure that many of you have been victims of data loss due to a power outage. In some cases, devastated by this event. Most people that need certain safe guards from power outages use a Uninterruptible Power Supply (UPS). It used to be that a UPS would only be used at places such as data centers or critical business applications. Since the cost of a UPS has come down considerably over the years, this is now a cost effective solution for personal computers too.
A UPS is nothing more than a battery backup. So, knowing that the UPS is giving you 'battery' power during a power outage, you know that you are not going to be able to continue working on your computer, but you will have enough time to save the work that you've already started. That is its sole purpose.
If you have unsaved data and are away from your computer during a power outage, you can configure your 'Power Option' settings to ensure that your computer will go in to Hibernate mode before the battery backup power is gone. Once a computer enters Hibernate mode, it takes all of the data that is in memory and stores it on your hard drive. Here is how to configure this setting:
Go to Start>> Control Panel>> Performance and Maintenance>> Power Options.
In Power Option Properties, select the Hibernate tab.
Place a checkmark in the checkbox titled: Enable hibernation. Click Apply
Click the Power Schemes tab.
In the Power Schemes drop down menu, select Max Battery from the list.
In the "System hibernates" category, select a time that is less than your maximum backup battery life. Click Apply
Exit all windows.
Store all of your passwords on one secure database
If you have a long list of user names and passwords used for a variety of different frequently accessed programs, then it will interest you to know that there is a free utility that uses a high level encryption to keep these sensitive items safely stored in its database. This free utility is called "KeePass". It is an open-source password manager designed to store all of your passwords and user names in a safe and secure way, and all on one database.
Instructions for use:
Download and Run the KeePass program.
From the 'File' menu select "New Database".
Enter a Master Password or select a "Key Disk".
You can now store your passwords in Groups. As an example; Store all of your banking, asset management or home business passwords in a group named "Financial". Store all of your game site passwords in another group named "Games".
Populate each group by selecting each group in the right pane and right click the group entry. Select "Add Entry" from the resulting menu.
Note: To get familiar with this powerful utility, you can browse their help files. Click on the "?" for help.
BIOS Settings
As your system boots, Windows has created a method to gain access to the BIOS settings. Most commonly, this entails pressing the DELETE key on your keyboard repeatedly as the system boots. If you have created a BIOS password, you will be prompted as some point to enter it. If you have forgotten your BIOS password, we have a web page that can help:
BIOS Generic Passwords
Once you've gained entrance to the BIOS settings you will see many self explanatory settings. The settings you see will depend on the manufacturer of your motherboard.
Windows Utilities Shortcuts
Here are some popular shortcuts to handy Windows utilities:
Simply type the shortcut command in to the Run textbox (Start>> Run), then click OK.
Shortcut
Utility
compmgmt.msc Computer Management
devmgmt.msc Device Manager
dfrg.msc Disk Defragmenter
diskmgmt.msc Disk Management
eventvwr.msc Event Viewer
fsmgmt.msc Shared Folders Manager
gpedit.msc Group Policies Editor
lusrmgr.msc Local Users and Groups Manager
perfmon.msc Performance Monitor
secpol.msc Local Security Settings
services.msc Services
Create a Password Reset Disk
Creating a password reset disk is a great backup idea for when/if you should ever forget your login password. You will need to be running XP Professional as a local user in a workgroup environment. Here's how to create the disk:
Go to Start>> Control Panel>> User Accounts
Select your account name.
Under the Related Tasks category, select "Prevent a forgotten password".
The Forgotten Password Wizard will now be invoked. Follow the onscreen instructions to successfully create your Password Reset Disk.
Important: Be sure to store this disk in a safe place. Anyone having access to it can easily access your information.
Using the Windows Key
The Windows logo key, located in the bottom row of most computer keyboards is a little-used treasure. Don't ignore it. It is the shortcut anchor for the following commands:
Windows: Display the Start menu
Windows + D: Minimize or restore all windows
Windows + E: Display Windows Explorer
Windows + F: Display Search for files
Windows + L: Lock the workstation
Windows + M: Minimize all windows
Windows + Q: Quick switching of users (Powertoys only)
Windows + Q: Hold Windows Key, then tap Q to scroll thru the different users on your pc
Windows + R: Display Run dialog box
Windows + U: Open Utility Manager
Windows + Ctrl + F: Display Search for computer
Windows + F1: Display Help and Support Center
Windows + Pause/ Break: Display System Properties dialog box
Windows + Shift + M: Undo minimize all windows
Windows + Tab: Cycles through all open programs and taskbar buttons. Press [ENTER] to select.
Subscribe to:
Posts (Atom)